First Steps
In this tutorial you will find the most important information for getting started on the AGORA platform. You only need the data of your user ID (UHH) to access our platform. After logging in, you can request participation for any workspace that interests you – for example, for a seminar project workspace of your lecturer. You can log in to as many workspaces as you like with your account, or even open your own workspaces. In the following chapters we explain the most important steps for new AGORA users in detail.
| Note: If you are not a memebr of University of Hamburg and do not have a UHH user ID, you can still use AGORA if you are invited by the moderators of a project workspace to create an AGORA ID. In this case, please contact your lecturer. After you have received an invitation email, please follow the link and enter your data in the form that appears and accept the user agreements. Then you are successfully logged in to AGORA and can search for and enter the desired workspace in the menu item “All workspaces”, which you will find at the top of the screen. |
1. Login
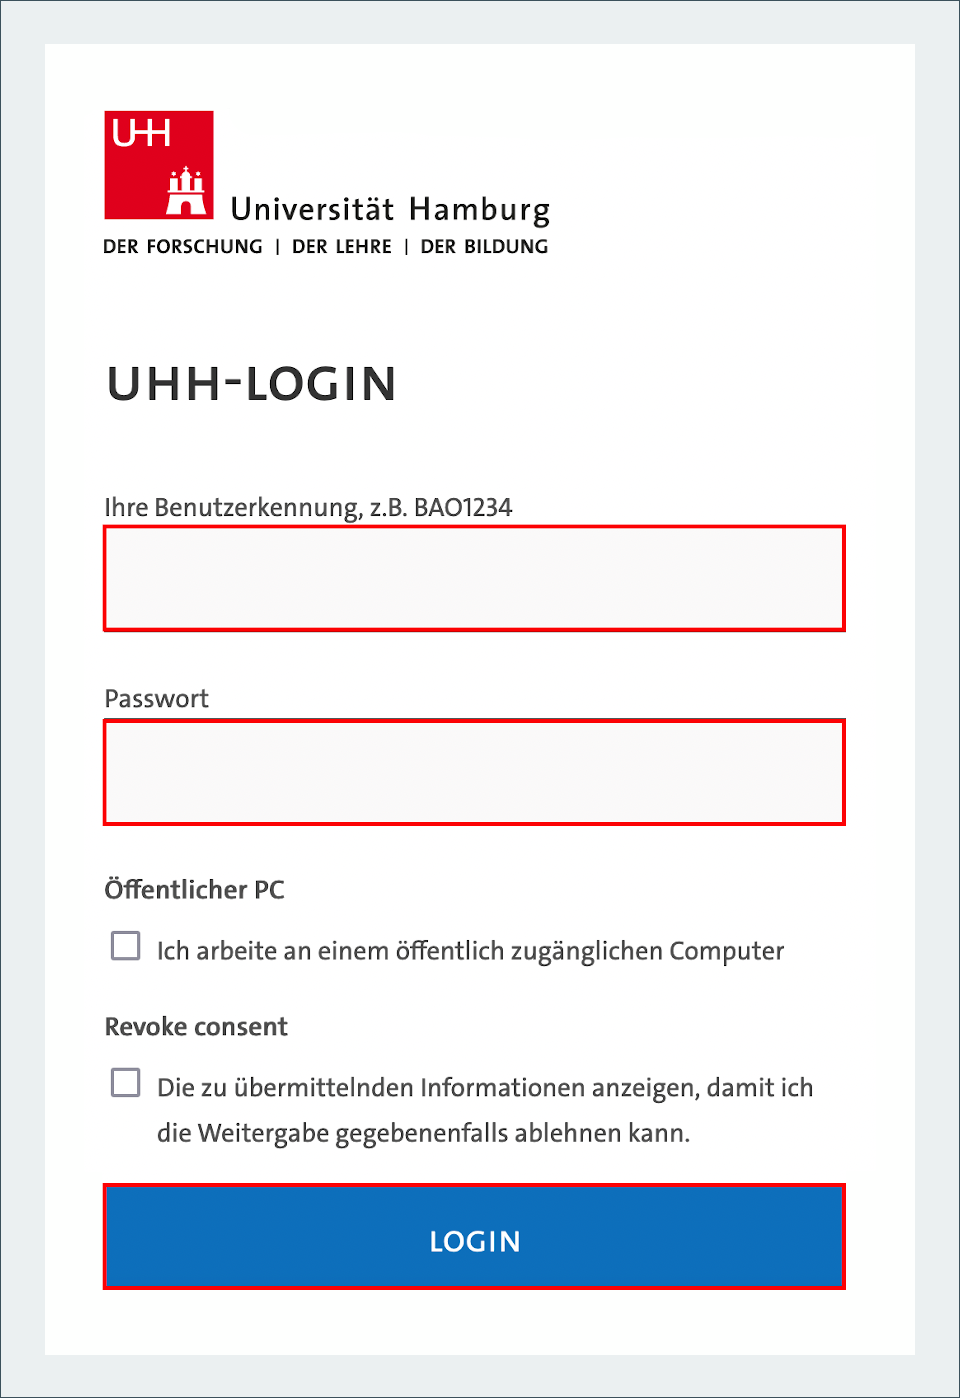
Employees and students of the University of Hamburg can log in to AGORA with their user ID (B-identifier or “STiNE-identifier”). To do so, open the AGORA homepage in your browser and click on the link “To AGORA login”. If necessary, scroll down a little until you reach the login field. Here, first click on the “Login” field.

Enter your access data (ID and password) of your user ID here and click on “Login”.

Please note: The source is preset to “Benutzerkennung der UHH”. If you are still using an old AGORA(CommSy) account, switch to “Lokale Kennung” before logging in.

Fig. 3: Login via Shibboleth
| Note: If you are an external user and do not have a UHH user ID, you can be invited by the workspace moderation to register to the portal. If you need access to the portal for other reasons, please contact the portal moderation with this support form. |
2. Dashboard
The dashboard is the starting point of our platform, which you access after logging in. Here you can see the “Workspaces” and “My Views” buttons, as well as recent entries from your workspaces and your calendar.

- CommSy bar: An important functional element of CommSy. It includes a link to your profile.
- Workspace search: Enter keywords (e.g., the name of the seminar or lecturer) to find workspaces on the CommSy platform.
- Workspaces: A list of workspaces. When you are logged in, you can view your workspaces here. When you use the workspace search, the results will be listed here instead.
- Create workspaces : You can create project workspaces and community workspaces.
3. Workspace Membership
If you are logged in to AGORA, you can become a participant in project and community spaces on the platform.
- Select a workspace from the “List of all workspaces”. If you cannot find a workspace or are not yet a participant in workspaces (i.e. your workspace list is empty), use the workspace search in the middle of the page. → more about the workspace search
- Click on the “Apply for membership” link below the workspace you want to join. You will be prompted to enter either a participation code or a participation reason – depending on how the moderator of that workspace has set the participation preferences.
Participation reason: Indicate why you want to participate in the workspace (such as “I am a participant in seminar XY”) and submit the note. The moderator of the workspace will be notified automatically and will then activate you for the workspace. After activation you will receive a notification by e-mail and can use all offers in the workspace.
Participation code: Enter the participation code. If you enter it correctly, you will be let into the workspace immediately.
| Tip: The code for registration is often announced in the first session of a course. If you do not know the code, ask the workspace moderator. |
4. Workspace and Rubrics
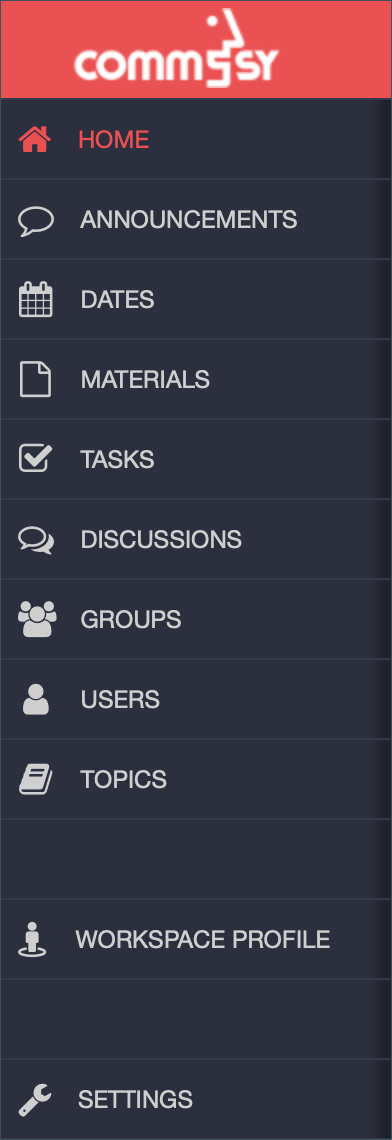
After you have successfully applied for participation in a project workspace (see “workspace participation”), there is a lot to discover in this project workspace. Each project workspace is divided into different sections, which appear as a bar on the left (see Fig. 5). In the mobile view or on narrow screens, this bar may be collapsed and only shows the icons of the sections. The individual sections are explained below.

Announcements: Here you can see announcements created by other workspace participants or post your own announcements.
Dates: In this section there is an interactive calendar, which may already be equipped with some dates that relate to the workspace topic – if the workspace was created to accompany a seminar, for example, it would make sense to enter the seminar dates at this point. If you want to know how to set up a recurring date see this FAQ.
Materials: This is the right place to post materials of any kind that are relevant to your particular project. There are no restrictions on the file formats you can upload. Choose images, videos and texts that can add content to the project space and upload them in a separate material entry. Material entries can be subdivided using sections. For detailed information, see the tutorial “adding materials”.
Tasks: Here you can, for example, set work orders and provide them with processing details. Participants can indicate how long it took them to complete a task.
Discussions: The “Discussions” section is similar to the material section. Although it is mainly intended for discussion, there is also the possibility to attach files here. Within a discussion entry you will find a description field where you can enter your contribution to the discussion.
Groups: Under the heading “Groups”, the members of a project workspace can form themselves into subgroups – for example for tutorials, study groups or for individual topics. The individual groups also have the option of setting up an access-protected group workspace subordinate to the project workspace, which has the same functions as the project workspace itself – but can only be entered and used by members of the group if required. This rubric may need to be activated by the workspace moderator before it is listed in the rubric bar. For more information, see the “group workspaces” tutorial.
Users: If you click on this section, you will find a list of all members of this project workspace. Here you have access to all personal information that the other members have unlocked about themselves and you can write them an e-mail. Workspace moderators manage the registered participants in this section. If you have activated the person workspaces function, you can access them via this section. See the tutorial “Personal workspaces” for more information.
Settings: Only visible for workspace moderators. Here you will find an overview of all settings options divided into different menus (left). To configure a project workspace, you must have created the workspace you want to configure yourself or be a moderator of this project workspace. In AGORA, a moderator has various possibilities to adapt a project workspace to your or the group's needs using the settings options. You can find more information in the tutorial “workspace settings”.
Workspace profile: After entering a workspace, you can change information about yourself and your contact data in the “workspace profile” section in the section bar.
5. Create Workspace
If you are logged in to AGORA and would like to become a workspace moderator for a new project workspace, please follow these steps:
- Go to the “workspaces” field on the dashboard and click on “Create new workspace”.
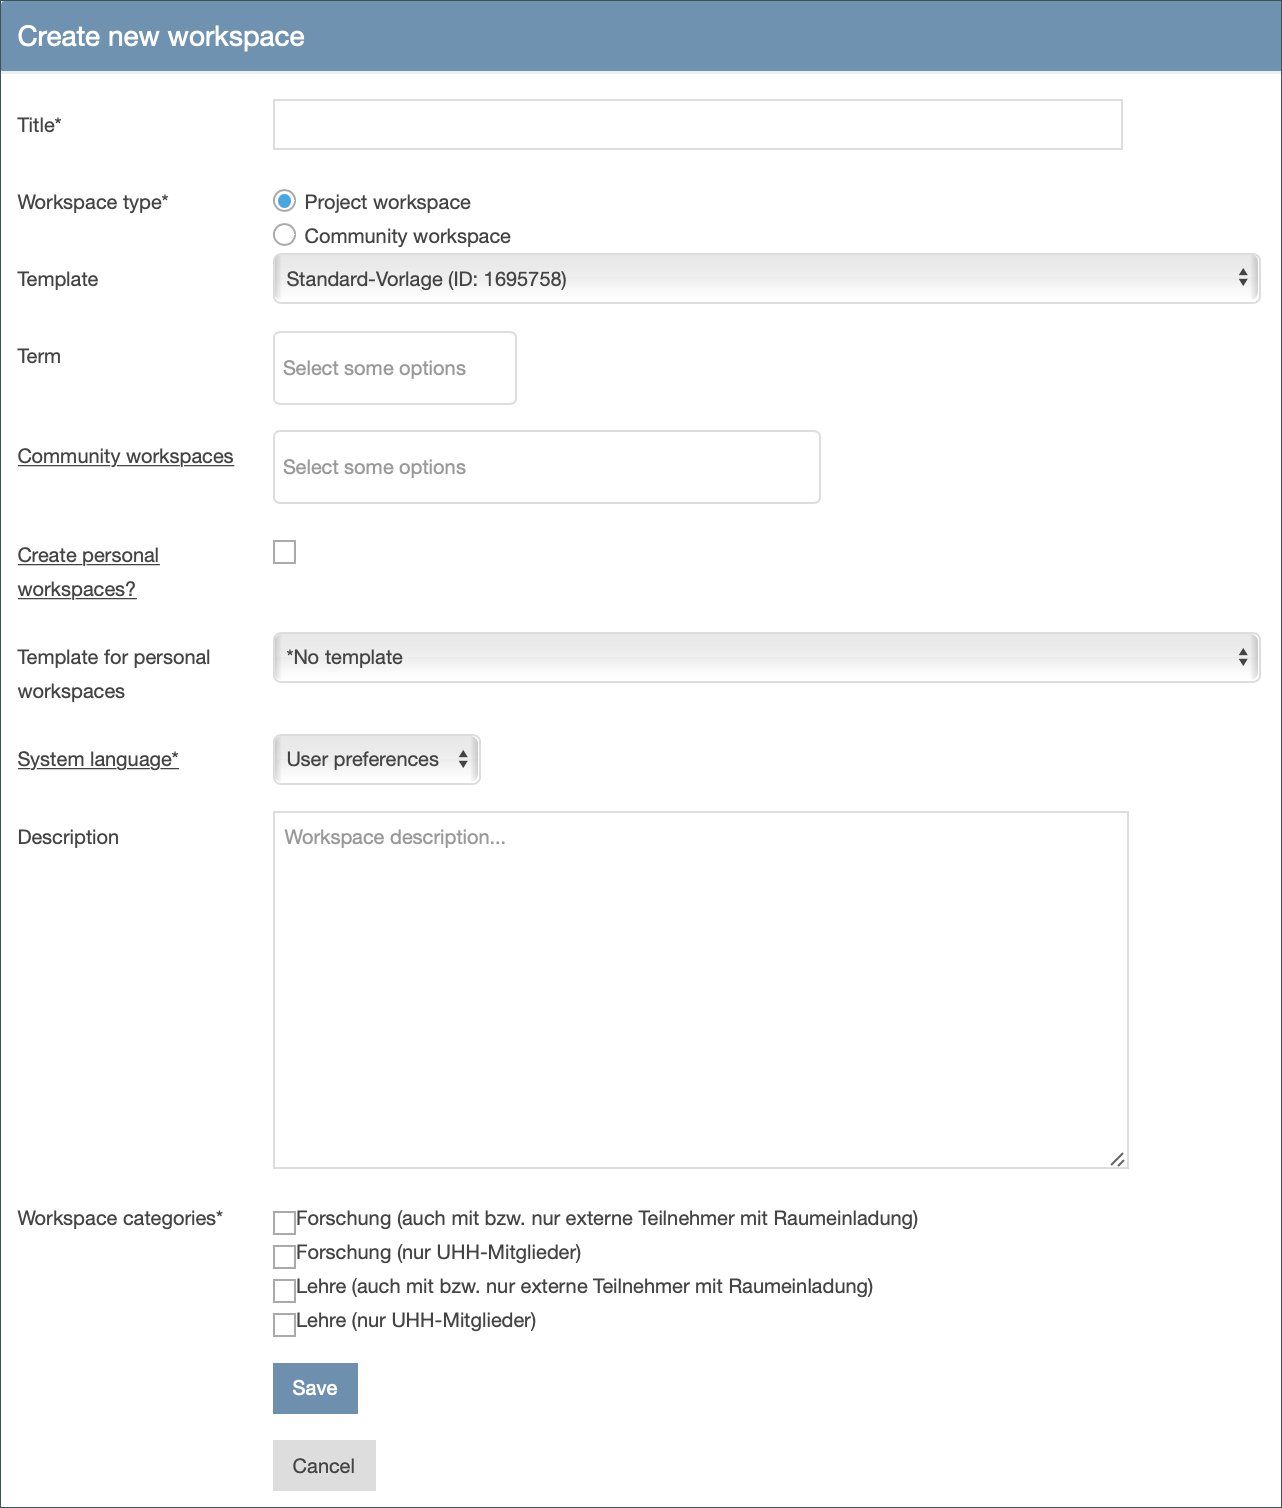
- A page with a form will open (Fig. 6).
- Enter a title, select the workspace type and specify under “Language” whether the user interface of the workspace is displayed in German or English.

The other details are optional and primarily serve to provide better orientation for potential users. At this point, you can also choose whether personal workspaces should be created. We recommend that you always include information on the items “Semester” and “Description” to make your workspace easier to find for potential participants.
A special feature is the field “Template”. By selecting a template, you can open a workspace that is already filled with content. In addition to the standard template, templates from the ABK area (General Professional Qualifications) and the DL Office, for example, are freely available.
| Note: If you want to learn more about the design and structuring of entries, we recommend the tutorials “Adding material” and “Structuring workspace content”. In the tutorial “Workspace settings” you will find the most important information for moderators. |
