Personal workspaces
The new CommSy feature “Personal workspace” creates a separate area that can only be accessed by the workspace moderator and a single student. The workspace moderator can set individual tasks here and then correct them after completion – only visible to the respective students. The workspace moderator of a project workspace can enter any person workspace of the project workspace; the students, however, can only enter their own personal workspace.
1. Create personal workspaces
There are two possibilities for this:
- When you create a new project workspace, the option to activate the feature is offered directly in the usual list of setting options. Please note that this option is only listed once you have selected that the new workspace is a project workspace.
- If you already have a project workspace for which the feature has to be enabled, you can do so in the workspace settings of the respective project workspace. Use the left column to go to the “Extensions” area. Now place a check mark below the menu item “Personal workspaces” in the box behind “Activate personal workspaces?”. Scroll down and click “Save”.
 Fig. 1: Activate personal workspaces in the workspace settings
If you are the moderator in the project workspace, you are also the moderator in all the corresponding personal workspaces. The person to whom the personal workspace is assigned by name, therefore is not automatically the moderator of the personal workspace.
2. Enter personal workspaces
Go to the “Users” rubric. Next to each workspace member there is an icon for entering the person's personal workspace.

3. Create entries in personal workspaces
You can create entries directly in personal workspaces. But you can also perform a mass action in which an entry is inserted into each personal workspace of the desired project workspace.
| Note: These instructions assume that your “Marked entried” section is currently empty. Otherwise, make sure that “Marked entries” currently only contains entries that are meant to be transferred to personal workspaces by the mass action. |
- The best way to do this is to create an entry in “My stack”. You can access this in the bar at the top.
- When the entry is saved and ready, click on “Choose action” and then on “Add to ‘Marked entries’”. Now select the desired entry and confirm the selection with “Execute action”.
- Now go to the project workspace in whose person workspaces the entry is to be inserted. Go to the “Users” section.
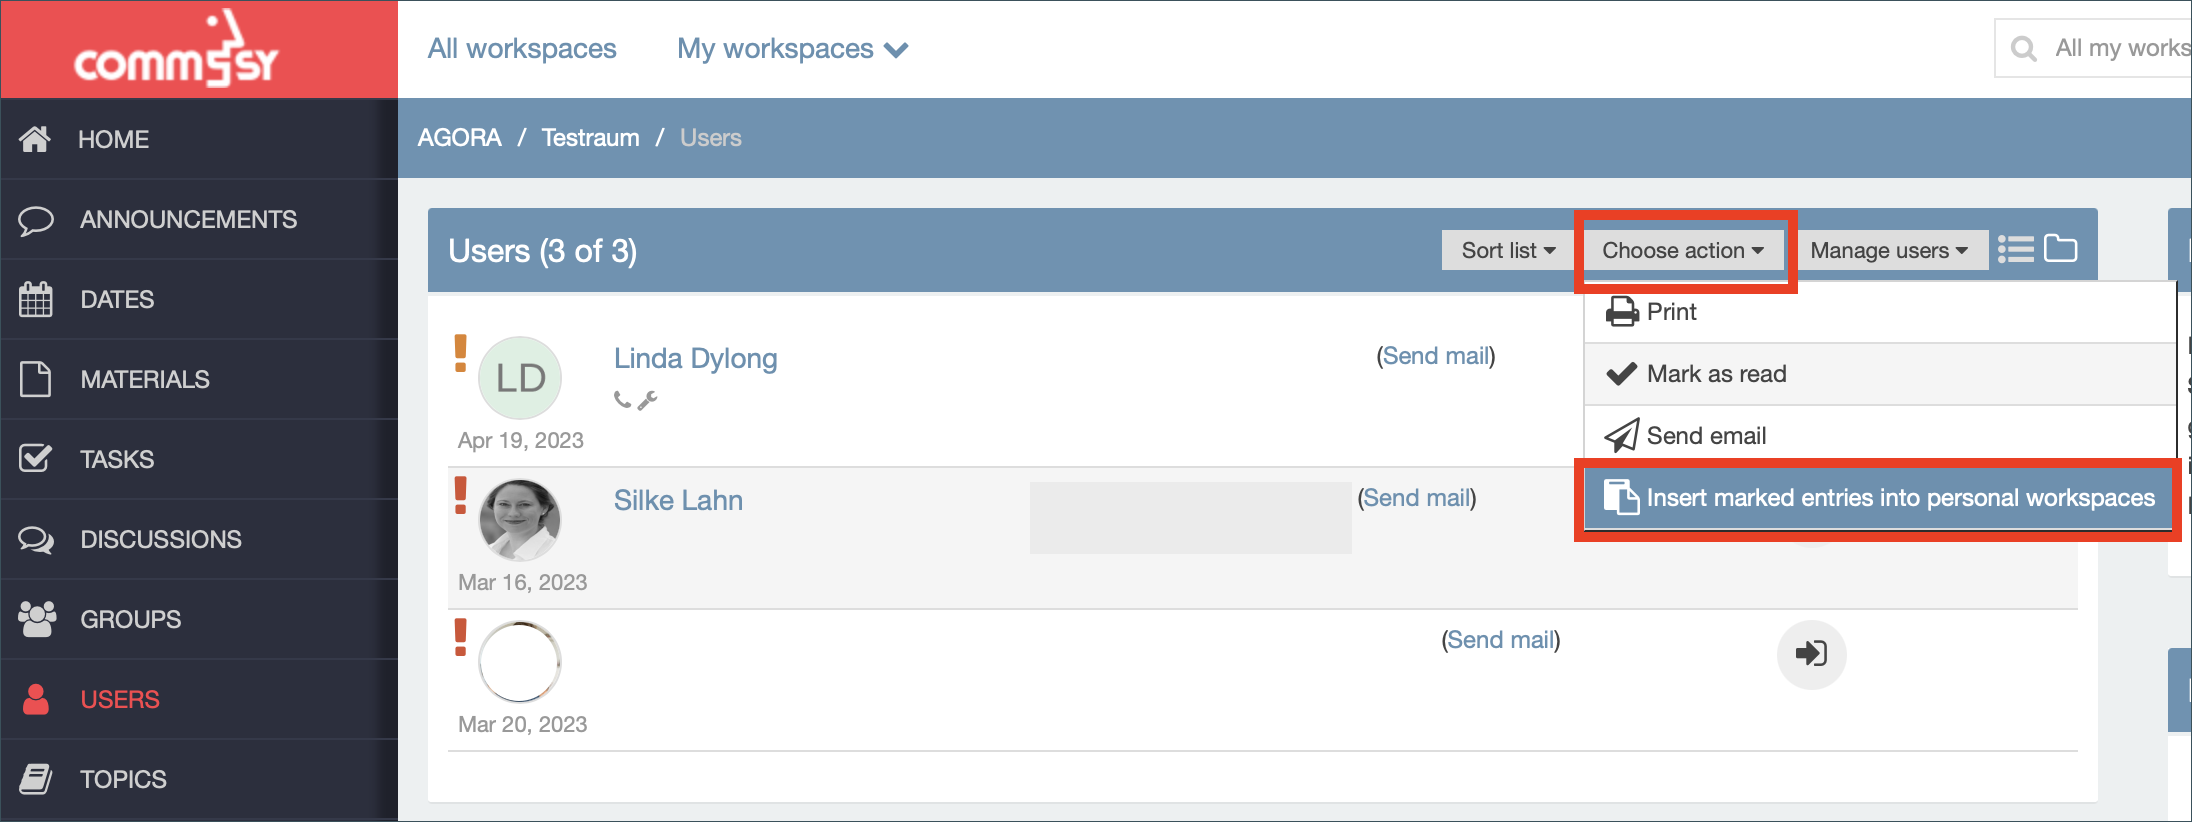
- Under “Choose action” select the option “Insert marked entries into pesonal workspaces”. Select all users to whom the entry is to be made available and confirm with “Execute action”.

4. Deleting personal workspaces
If a project workspace is deleted, all associated personal workspaces are automatically deleted as well. Personal workspaces cannot be deleted individually.
|
