Adding materials
You can upload material to AGORA both for your personal use and as part of a lecture, seminar or research group to make it available to other users.
You can upload materials:
- in your personal dashboard, which you can access via the CommSy bar,
- in a project workspace you have created,
- in any project workspace you have joined as a member or moderator.
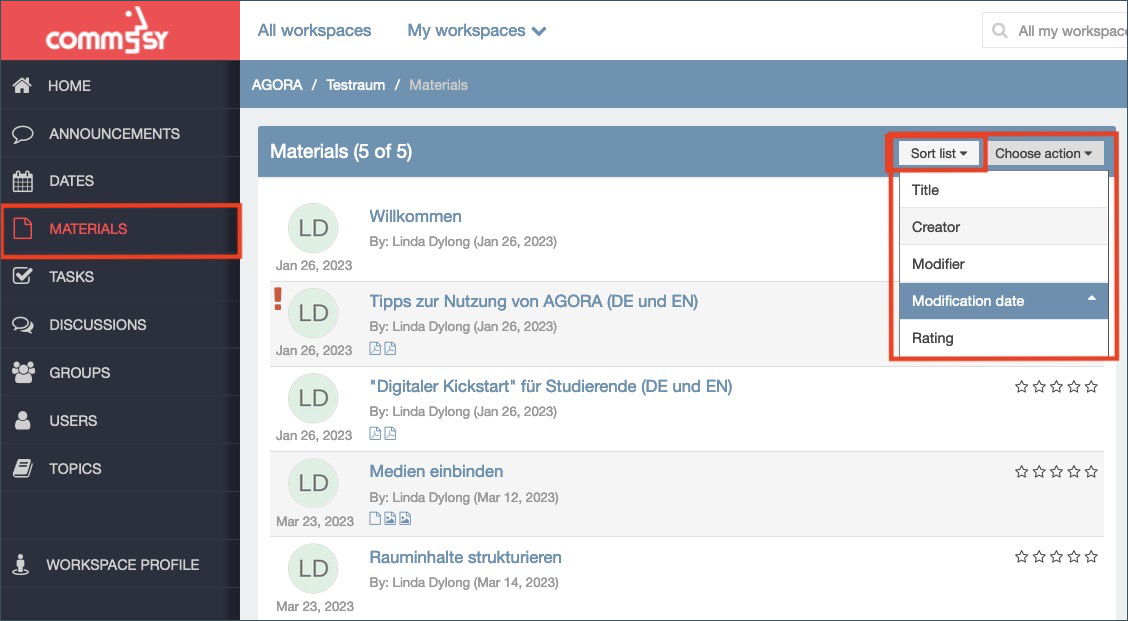
You can also add materials to different rubrics. This tutorial demonstrates how to add materials to the “Materials” rubric. As its name suggests, the purpose of this rubric is to make materials available for use. The process is similar for all other rubrics. Existing materials are displayed as a list in the rubric (Fig. 1). By default, they are sorted according to their date of creation. To sort the list by title, creator, or modifier, open the dropdown menu labeled “Sort list” and choose the corresponding item.
| Note: Material can as well be uploaded in task entries. The functions are created in the same way as material entries, and users and progress can also be indicated. Task entries are recommended if texts and other media are not used for general information, but are to be worked on in a team. |
|
Note: You can also set materials for resubmission on a time-controlled basis in order to be notified by mail if desired. This allows you to be reminded when a task is due, for example if texts in a seminar were provided at the beginning and are to be edited on a certain date. All you need to do is activate the “Resubmission” option in the settings. Then click on the “Edit” icon in the “Workflow” section of a material entry to set up a resubmission. |
1. New material entry
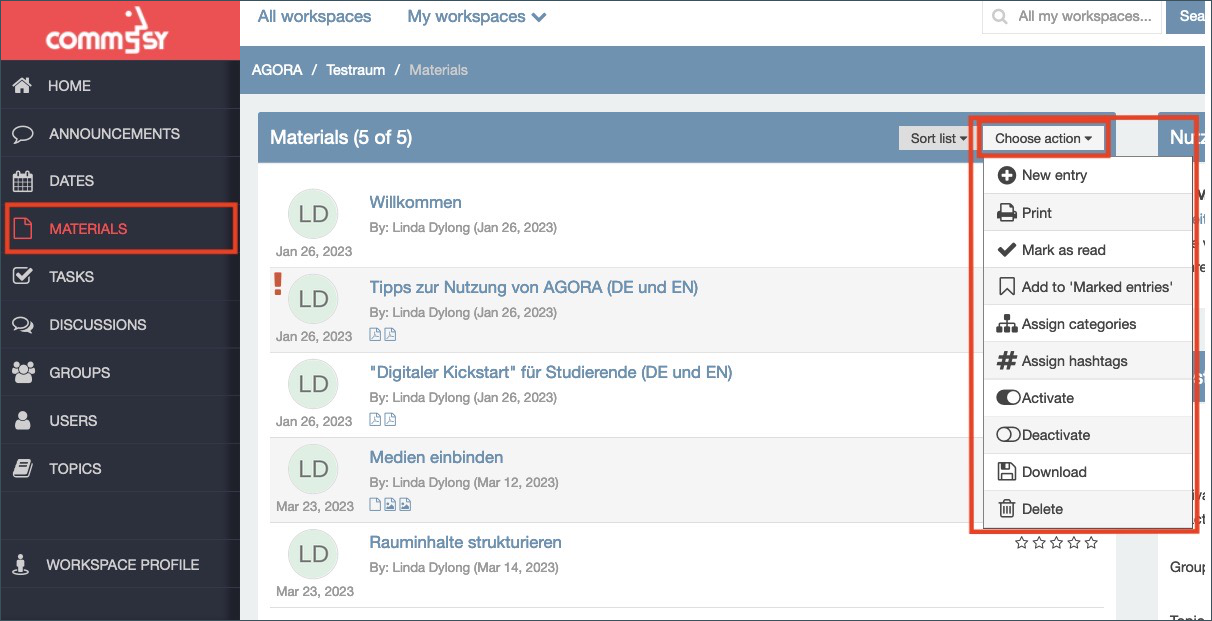
Use the function “New entry” in the “Choose action” menu on the right side of the editing bar to add new materials in different formats. CommSy supports almost all file formats. The only restriction is size. Individual files must not exceed 500 MB.
To add a new material entry, click “New entry” in the “Choose action” menu of the “Materials” rubric. A new page opens.
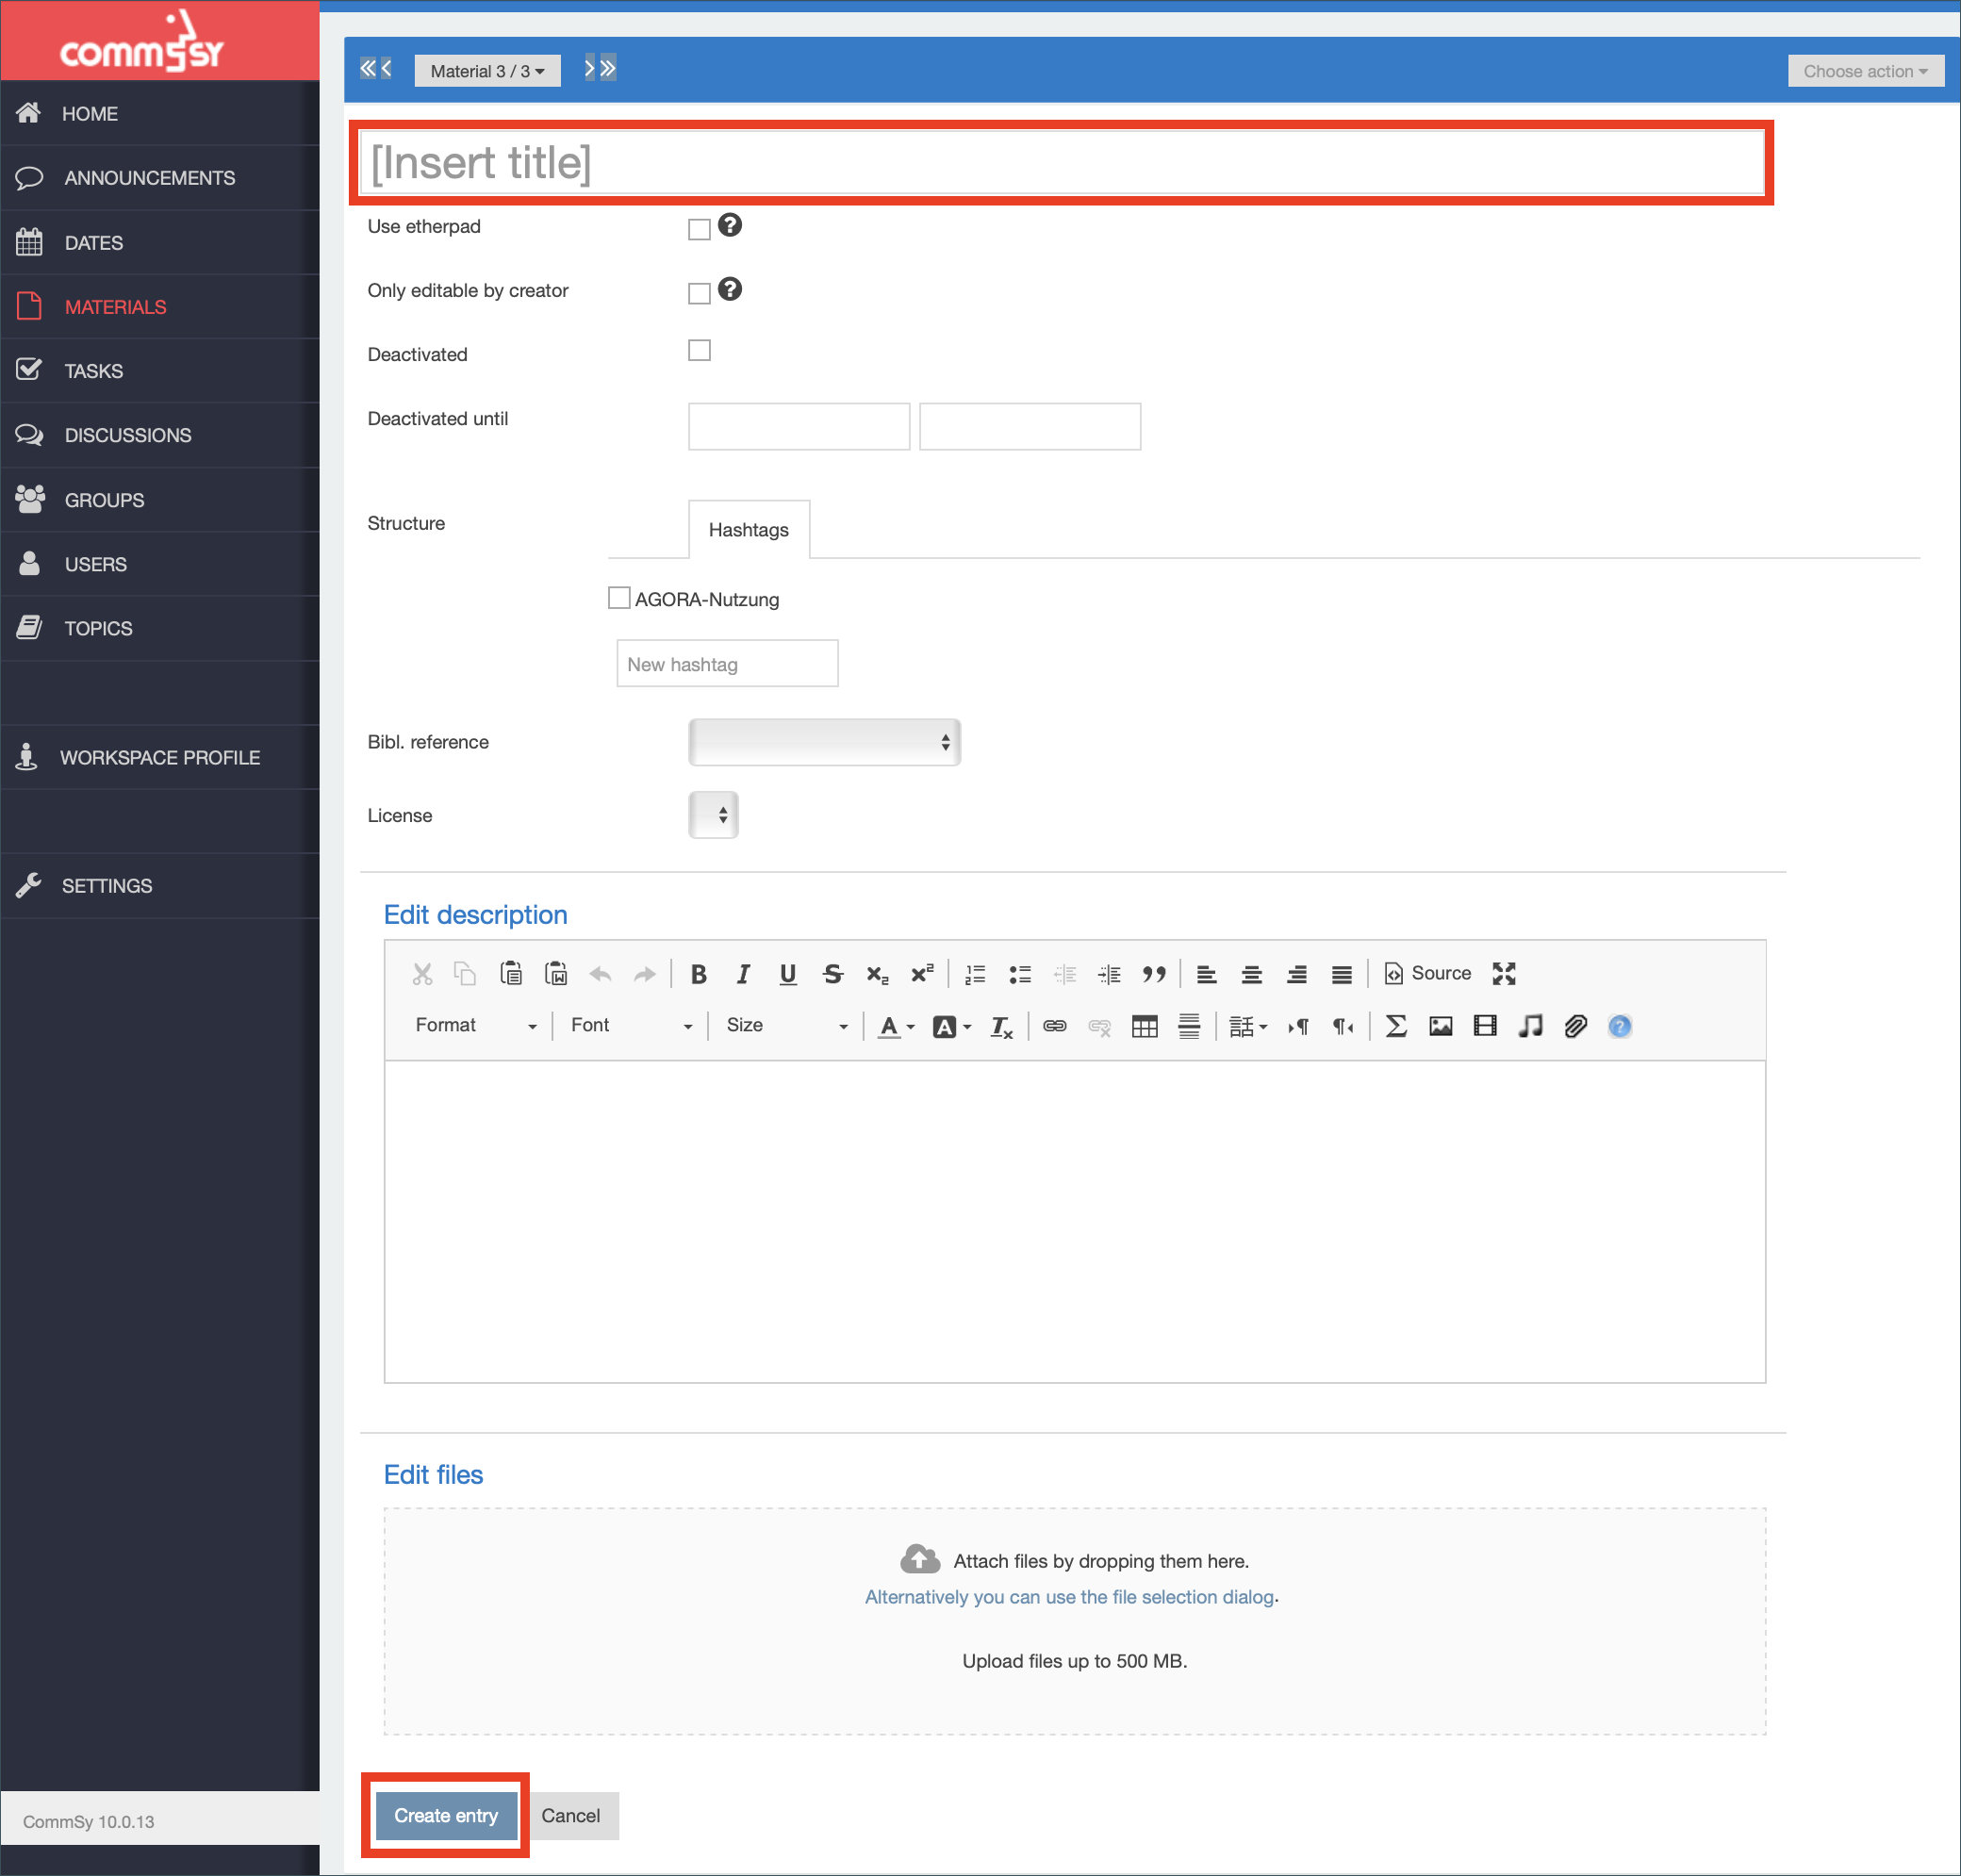
Give your entry a name (“Insert title”) and click “Create entry” (Fig. 3).
| Note: To add more information to your entry, you can provide bibliographical references. To do this, select the appropriate entry from the dropdown menu titled “Bibl. reference” and complete the additional fields. |
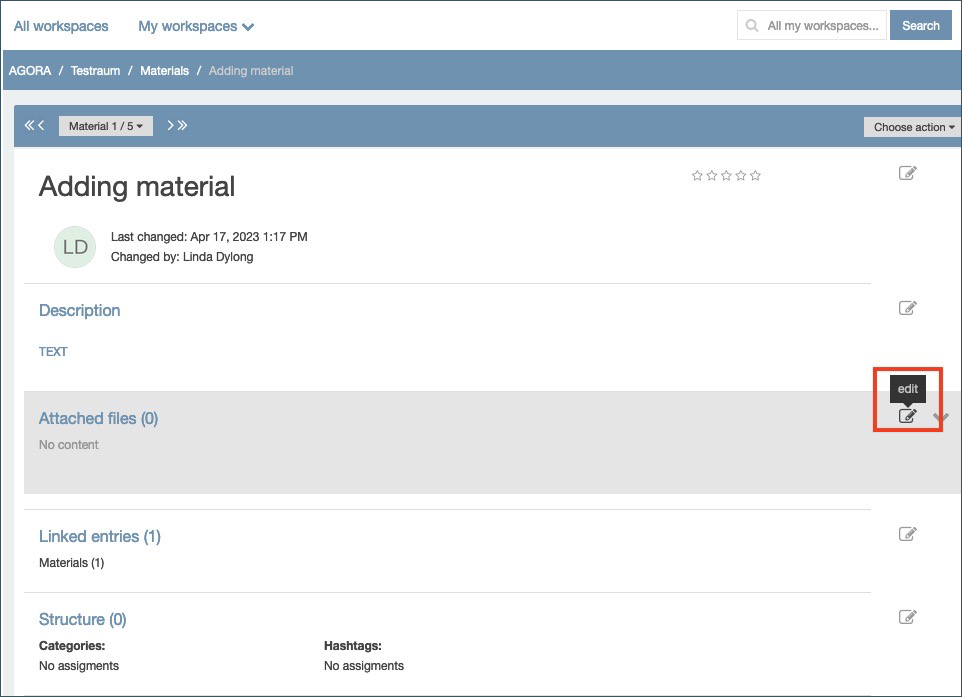
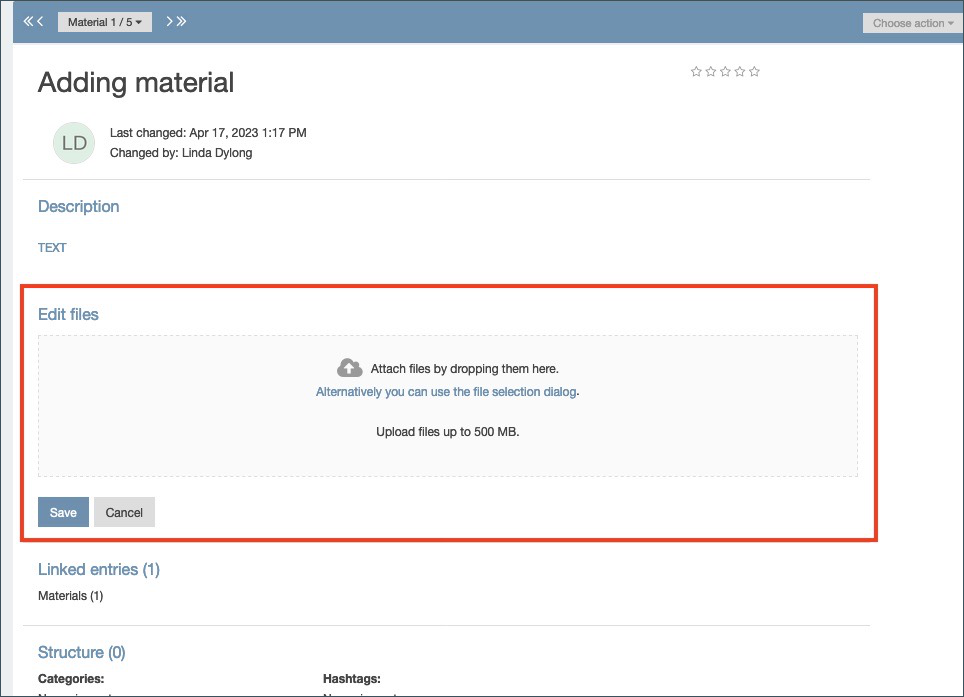
If you want to provide a more detailed description, click the “Edit” symbol next to the “Description” section. To upload files, click the same symbol next to “Attached files.”
An upload section opens. You can use it to upload files and attach them to your entry. CommSy Version 9 allows you to drag and drop files into the marked section as an alternative to using the classic file selection dialog. You can also select multiple files at once.
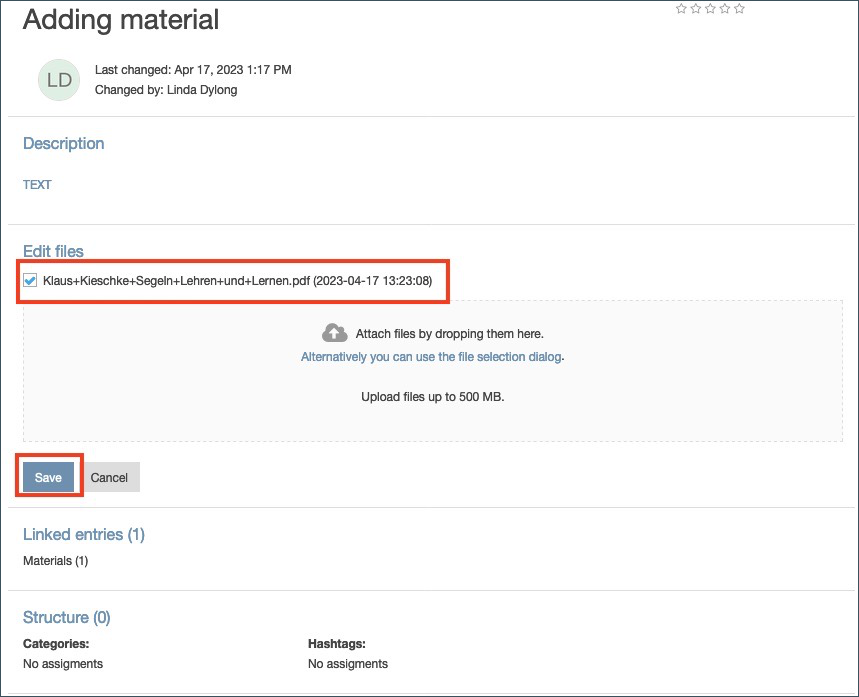
If your file has been added correctly, the file name will be displayed with a checkmark. Repeat the previous step if you want to add more files. If you add multiple files separately, they will be shown in alphabetical order, each with a checkmark. If you accidentally choose a wrong file or change your mind about uploading a file, click the checkmark to remove the file. Files without a checkmark will not be uploaded. They will be deleted when you save your changes. Click “Save” to add the files to your material entry.
| Note: The tutorial “Inserting media” explains how to insert files and media directly into your text. |
2. Access rights & events
When you add a new entry, the “Title” section offers three additional points: “Only editable by creator,” “Deactivated,” and “Deactivated until”. You can make a checkmark in the boxes next to these points. If you click the first checkbox, only you (and all moderators of the room) will be able to edit the entry. This prevents other members from editing, deleting, copying, or otherwise modifying your entry accidentally or intentionally. If you activate this setting, the editing option will be grayed out for all non-moderators.
| Note: To prevent your entries from being deleted (by mistake), please select “only to be edited by author” when creating an entry. Then all participants can still reply, but only you and the room moderator can edit or delete the entry. |
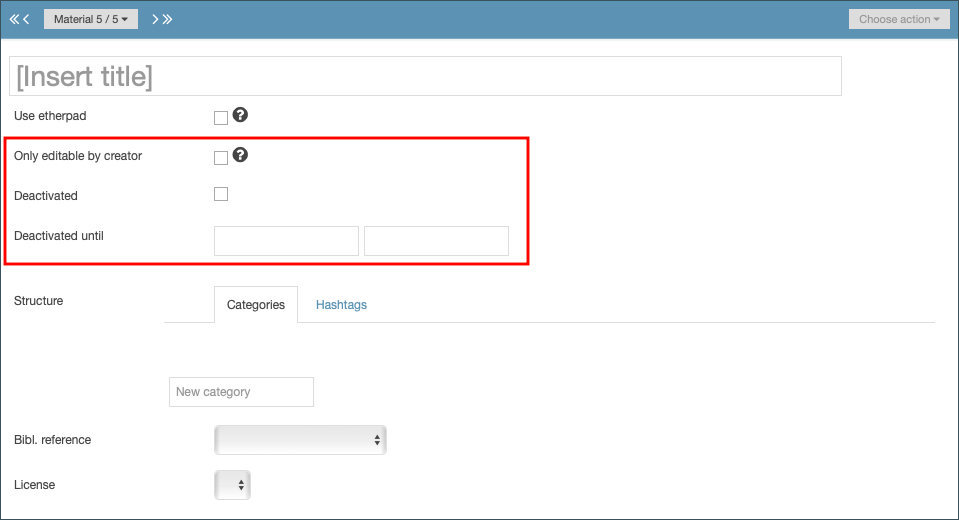
If you check the second box, “Deactivate,” you will be the only person who can view the entry. It will be hidden from all other members, including moderators. You can use this option to prepare an entry and publish it later, for example. To publish your entry manually later, leave the fields next to “Deactivated until” blank (Fig. 7).
Alternatively, you can enter a date and time here. Your entry will be published automatically at the specified point in time. All room members will be able to see it in the material list afterwards. You can either enter a date and time manually or use the calendar/time dropdown menus. The time is optional.
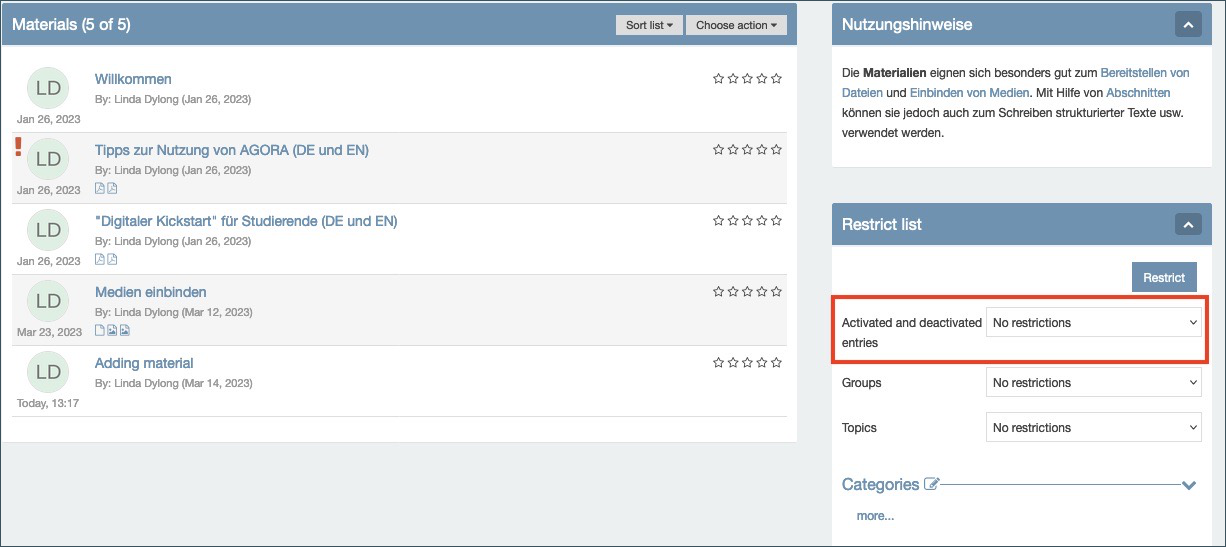
Initially, you will be unable to see the deactivated entry in your own list of materials. In the column on the right of the material list, choose “No restrictions”. This will make your deactivated entry visible to you.
3. Save as new version
When you edit your own or another member’s entry, you can save the edited entry as a new version. This enables you and others to access previous versions and see what has been changed. To do this, click the button labeled “Save new version” (Fig. 9) after editing the entry. CommSy will automatically save the entry as a new version instead of overwriting the original.
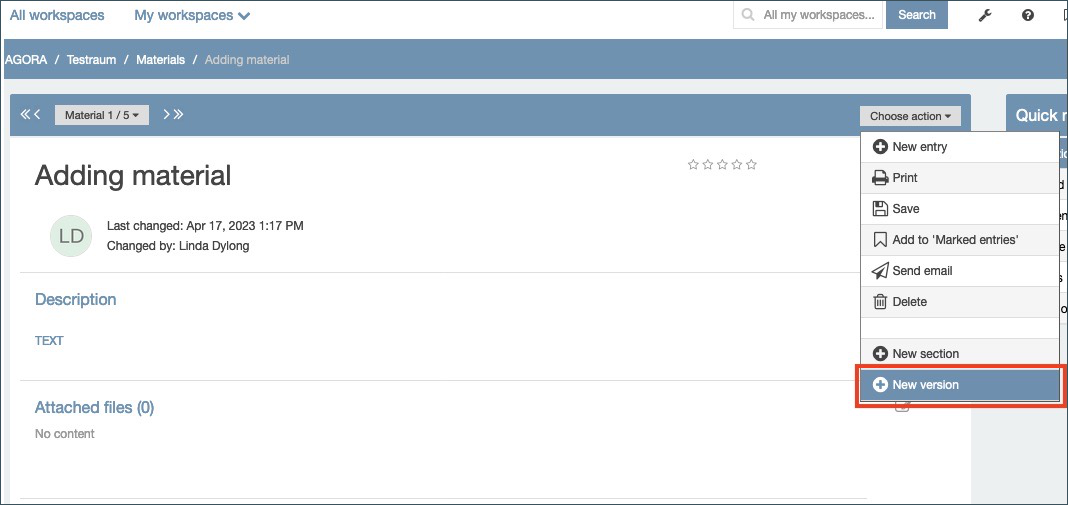
A timeline with multiple document symbols will appear above the entry. The symbols represent the different versions of the entry. Click a symbol to open the corresponding version. The symbol on the far left represents the original version of the entry. The symbol on the far right represents the most recent version. Hover your cursor over a symbol to see the date and time that version of the entry was created (Fig. 10).

4. Etherpad
Etherpad is a new editor in CommSy9. It allows multiple authors to edit texts collaboratively and simultaneously in real time. Each author is assigned a different text color. These colors are not visible in the saved version of the text, but you will see them when you open the entry for further editing. Etherpad also features a chat and a version history. This allows you to view older versions of the entry and restore them if necessary. This chapter explains the functions of this editor.
Activating Etherpad: You can only use Etherpad in the “Materials” rubric. When adding a new entry, you can choose to use Etherpad instead of the regular editor. This setting cannot be changed later.

Formatting: The Etherpad editor has considerably fewer formatting options than the classic editor (highlighted in Fig. 12 [1]). If you need more than the most basic formatting options (bold, italic, bullet lists, etc.), you should use the default editor.
| Note: Once the collaborative phase has finished, you can copy your text and paste it into a new entry with the regular editor. This will allow you to apply more advanced formatting options. |

Authorship colors: Each author is automatically assigned a color when he or she starts writing. You can change your color and display name (in Fig. 12 [2] on the far right). This menu also allows you to see who is currently working on the text. The authorship colors are not included in the saved version of the text, but they become visible when opening the entry for further editing. Click the button “Clear authorship colors” (eye symbol) to hide the colors in the editor.
Version history: Use the “Timeslider” button (the clock symbol in Fig. 12 [2]) to access the timeslider function. Older versions of the entry are automatically stored here. To save a version manually, click the “Save revision” button (the star symbol in Fig. 12 [2]). These saved versions will be marked with a star in the version history (Fig. 13). You can navigate within the timeline using the mouse; you will find the oldest entries on the far left. If you press the play button, all older versions will be run through chronologically, you can also jump forwards or backwards. The “Back to pad” button takes you back to the editor.

Chat: When multiple people are editing an entry in Etherpad, they can use the integrated chat for discussions. The content of the chat does not show up in the version history later. You can find the chat window on the right side of the screen, at the bottom of the editor. In the settings menu, you can expand the chat permanently.
5. Download material entries
In order to download material entries (including PDF, Word, JPEG etc.), please refer to the “Material” rubric and perform the following steps:
- Choose action: download.
- Select the entries you want to download.
- Select “Perform action”.
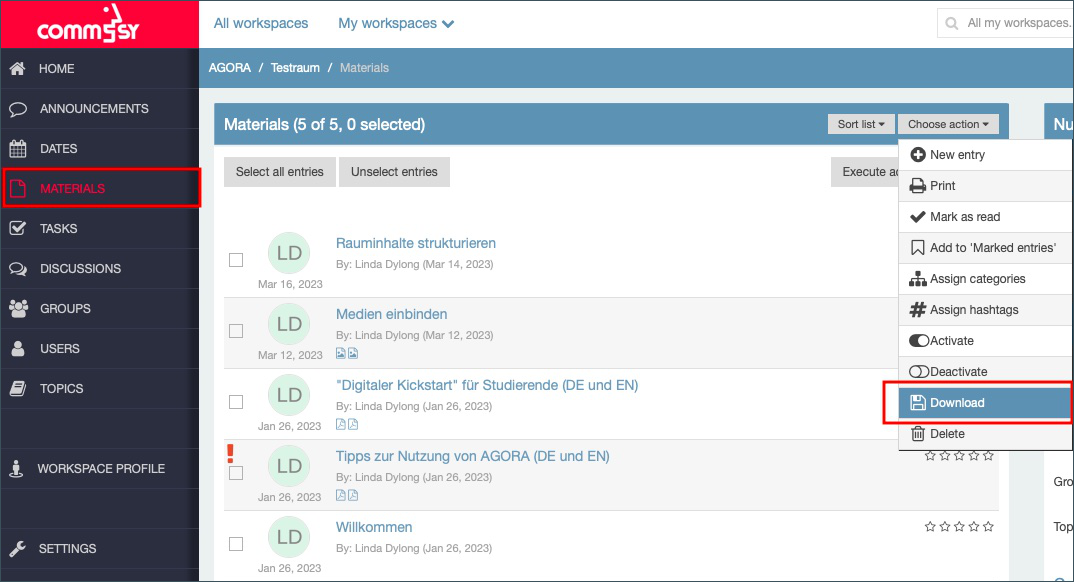
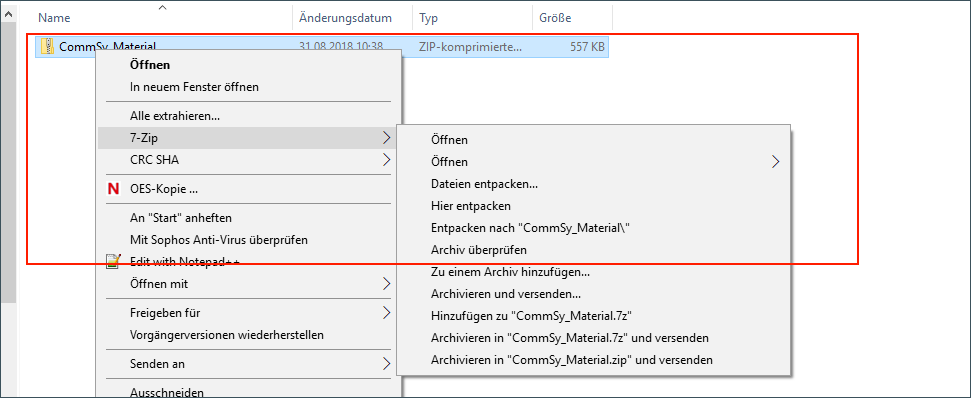
The selected content will be downloaded as a .zip file. In order to work with that content, the file has to be extracted.
Content can also be downloaded in the Tasks and Discussions rubrics.
| Note: Extracting the download files is done by 7-Zip or other programs that are usually pre-installed on your device. |
