Workspace settings
In this tutorial, you will find an overview of the seven menus hidden behind “Settings” at the bottom of the section bar of your workspace. You can use these to individually configure how your workspace works.
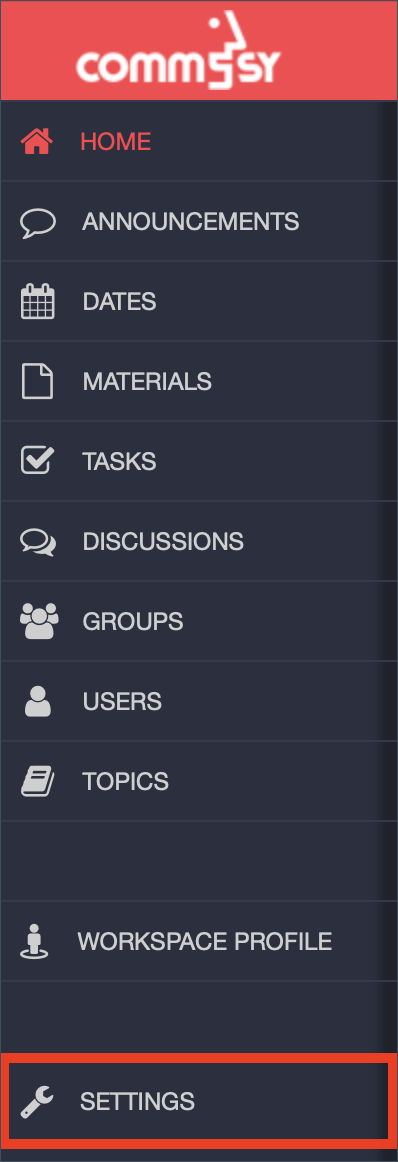
To configure a project workspace, you must have created the workspace to be configured yourself or be the moderator of this project workspace. CommSy gives moderators various options for adjusting their workspaces to their own needs and those of the group. You can find the “Settings” button next to the wrench symbol in the rubric bar (highlighted in Fig. 1).
| Note: The “Settings” page is available to workspace moderators only. Other users cannot see the corresponding button in the menu bar. |
1. General
In the first menu “General”, you can adjust the important settings after creating the workspace. It is important that you always click on “Save” at the bottom after you have changed something in the workspace settings.
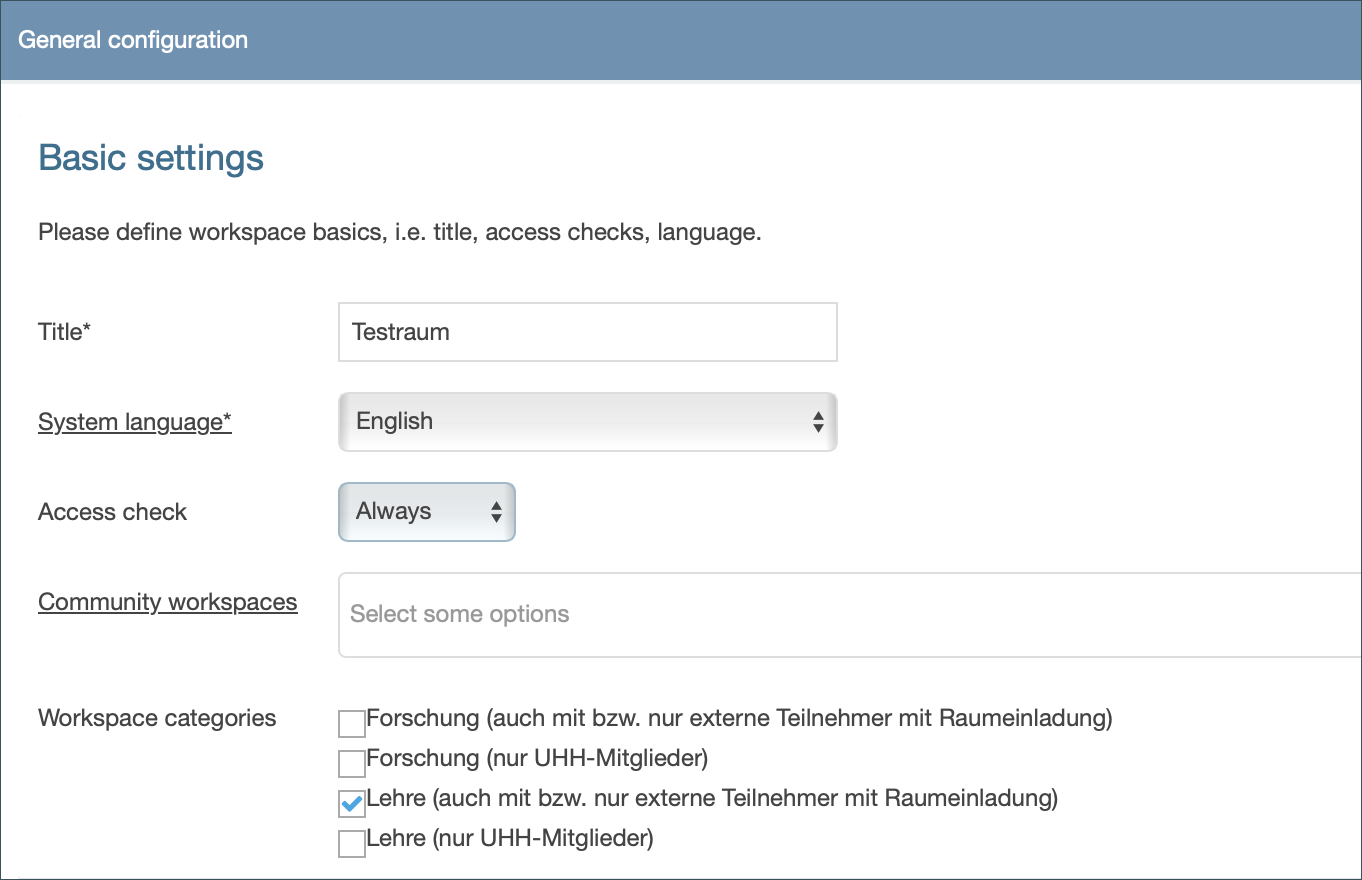
In the first section of this menu, “Basic settings”, you can change the title and language of the workspace, set the assignment to community workspaces, common workspace and add a workspace description, among other things. You will also find the participation and category settings here, which are explained below.
Access check: Specify whether you wish to check all membership requests manually (“Always”), give all users access automatically (“Deactivate”), or set a membership code (“Code”).
- “Always”: If you choose “Always” (set by default), you will receive an email whenever a user requests to enter your workspace. Clicking the link in the e-mail will approve their request.
- “Code”: The option “Code” is recommended for courses with many participants. If you choose this option, you will be asked to enter a code of your choice in the text field. Share this code with your students at the beginning of a course so that they can access your workspace independently.
- “Deactivate”: If you choose “Deactivate,” anyone will be able to access the workspace without a membership check or code. This setting is not recommended. Only use it in exceptional cases.
| Note: Setting a membership code is especially useful for courses with many participants. With the “Always” option, you have to approve all prospective members manually. |
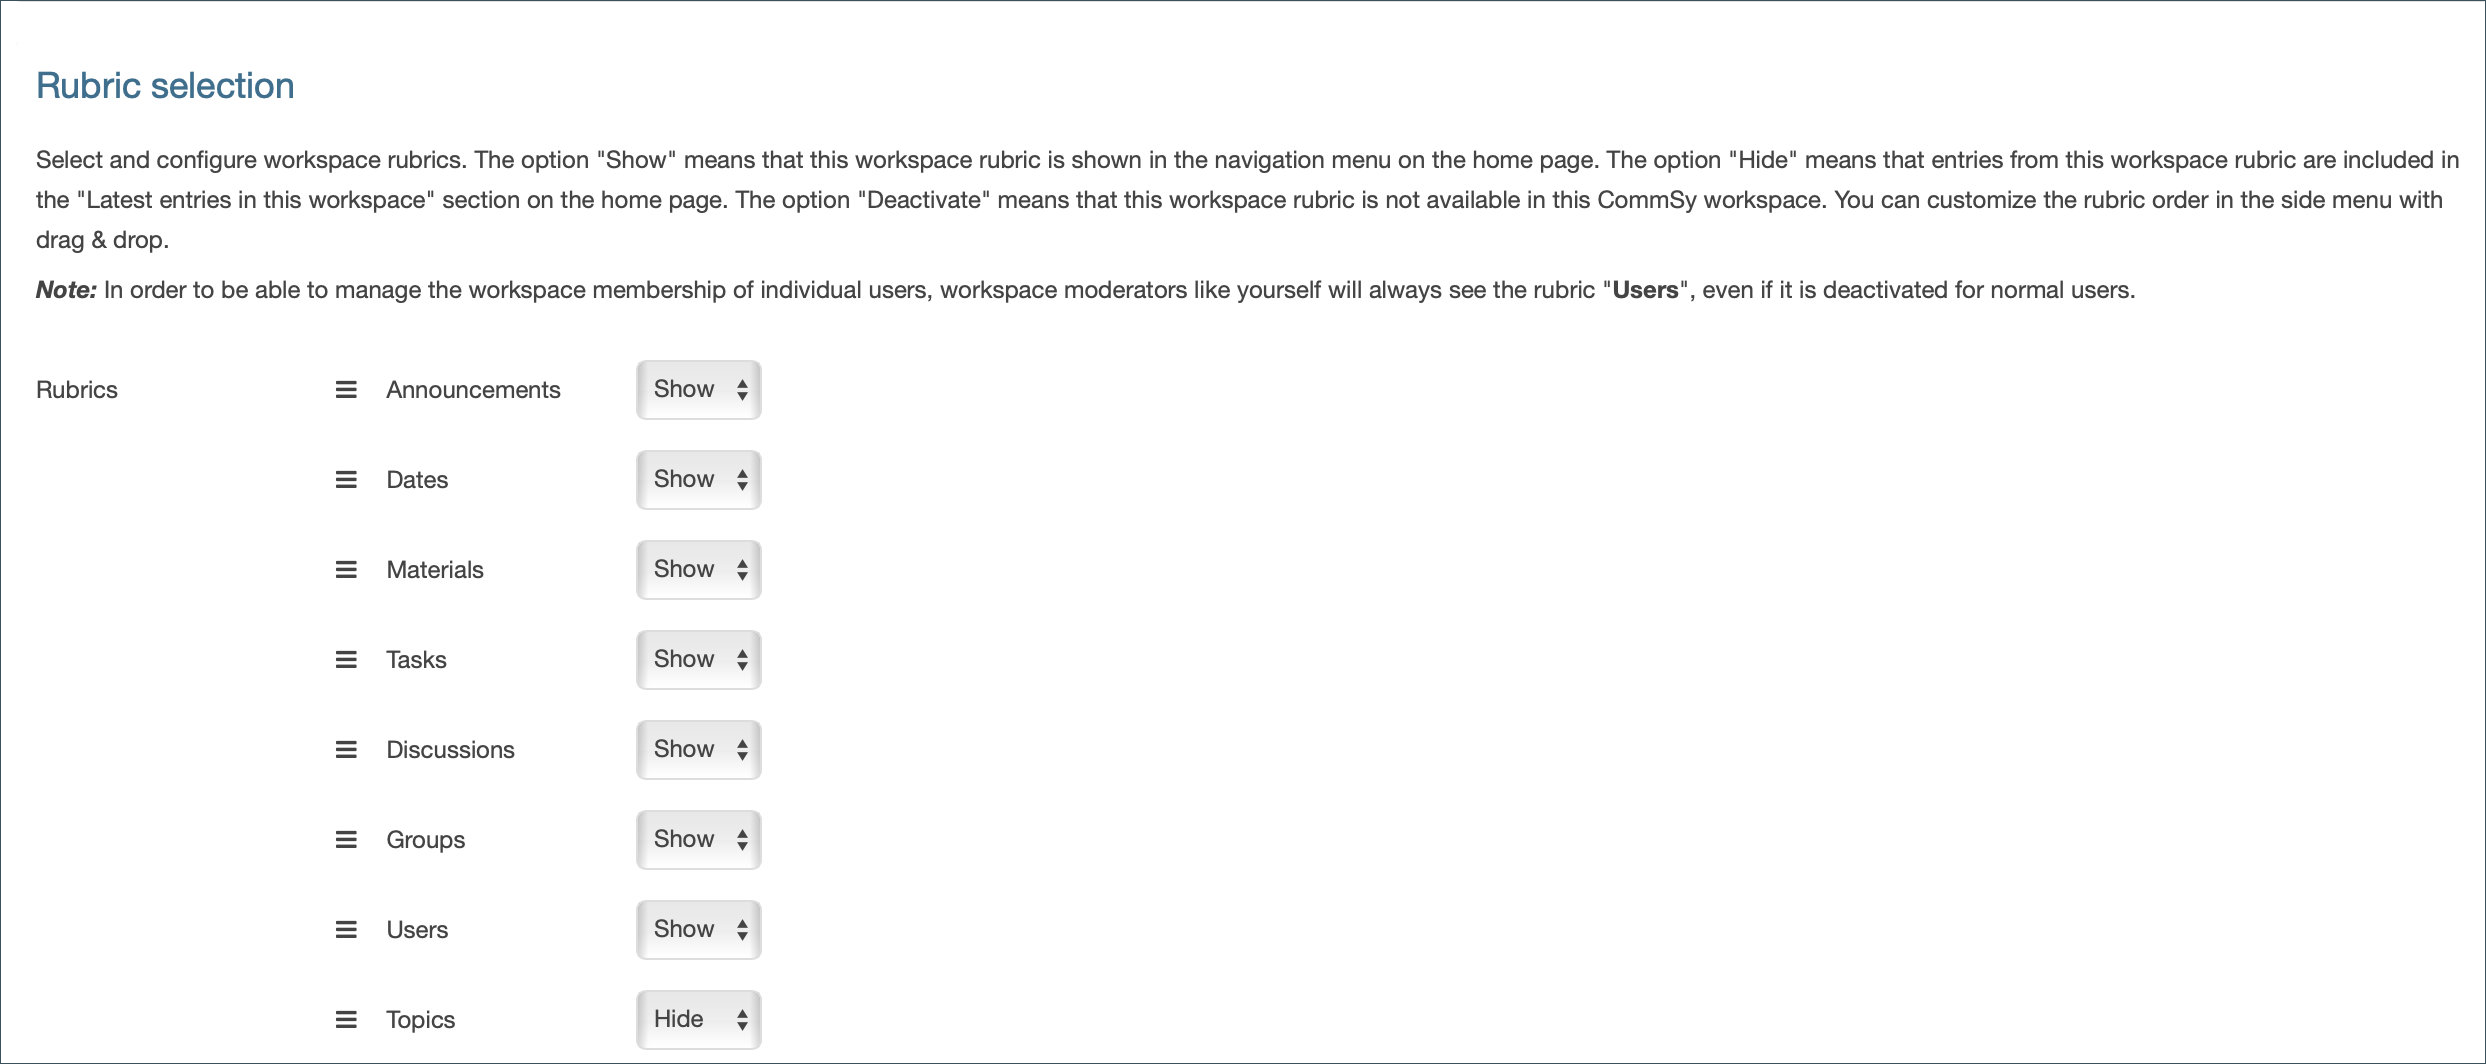
Rubric selection: This menu also contains the rubric settings. You can change the order of the rubrics by using drag and drop to rearrange them. Each rubric has a dropdown menu.
- “Show” means that the rubric will be displayed in the rubric bar and on the homepage.
- “Hide” means that entries in this rubric will not be displayed on the homepage.
- “Off” means that the rubric will not be available in the CommSy workspaceworkspace.
The person rubric is always displayed if you are the moderator of a workspace. In all other cases, as a moderator, you get the same view as all other workspace participants.
| Note: Turn the “User” rubric off to prevent the feed on the homepage from listing new workspace users, for example. You must save the workspace settings (bottom of the page) after changing them. |
Workspace Identifier: You can connect a course on STiNE to an AGORA Workspace, so that all participants of the STiNE course are automatically added to your AGORA workspace. This function will only work if the student is registered on AGORA and has logged in once before. So don't be surprised if the list of people in your AGORA workspace only fills up gradually - especially for first semester events.
To do this, first navigate to your course in STiNE. Then copy the STiNE-LV-ID (this is the numerical identifier of the course in STiNE). You will find it at the top right next to the course details; it usually starts with a 3 followed by 12 digits:

Then open your AGORA workspace. First click on “Workspace settings”, then on “General” and scroll down to the “Worksapce identifier" section. Then insert the STiNE ID here:

You can also link several STiNE-LV-IDs to one AGORA workspace. This means that courses such as parallel tutorials, which are divided into several courses in STiNE, can use the same workspace in AGORA. All you have to do is separate the individual STiNE course IDs with a comma.
If the STiNE-LV-ID has already been used by another person for an AGORA workspace, the same STiNE-LV-ID cannot be used for another AGORA workspace. If your STiNE-LV-ID is no longer available, please contact you DL-Office via the contact form.
| Note: Our FAQs on the topic of “workspace identification” could also help you: |
2. Moderation
The “Moderation” menu allows you to adjust various settings. You can set a notice to be displayed on the homepage, change the user notices for each rubric, and edit the standard e-mail texts that are sent out from the workspace (for example, when a new member has been approved).
Notice on homepage / notice board: You can choose a material entry, a task, a date, or an announcement to be displayed as a prominent banner on the homepage. Simply enter the content ID of the entry in the corresponding field. To view the content ID of an entry, click the arrow symbol (labeled “more ...”) on the top of the entry to the right of the title. The content ID will be displayed on the left side.
User notice: You can add user notices to each rubric of your workspace. They will be displayed in the column on the right side of the screen. Select a rubric and enter your text. You can use this function to tell your workspace members about the purpose of each rubric, for instance. Once you save your settings (bottom of the page), your individual notice text will be displayed in the column on the right side of the rubric.

E-mail configuration: This setting allows you to customize the texts of emails that are sent out via the workspace (for example, when a new member has been approved). You can use the dropdown menu to change individual parts of the standard texts, such as the greeting or form of address. The % signs and numbers in these texts are placeholders for usernames and other variables. Do not remove them.
3. Additional
In the “Additional” menu you will find a whole range of options that further optimize your workspace or enable interesting functions.
Structural auxiliaries: Here you can set whether and how the structuring auxiliaries “Hashtags” and “Categories” should be displayed in the sections of your workspace. You can find more detailed information on the structuring aids in the “Structuring workspace content” tutorial. You can also define the extent to which workspace participants are allowed to edit the calendar here.
Tasks: Here you can define for the task rubric whether additional statuses should be defined in addition to the three processing statuses “not processed”, “in process” and “completed” and then add them as required.
RSS feed: Enabling this option will allow participants to subscribe to the activities in this workspace via RSS. By default, this option is turned off.
Template: You can make your workspace available as a template, which is especially useful for you as a teacher if you repeatedly lead seminars with almost unchanged materials. You do not have to upload these materials for each seminar, instead you can make the old workspace available as a template at this point by ticking it and select the template when creating a new workspace. Under “Target group” you can also specify here for whom the template should be usable in the future: For all CommSy users, all members of this workspace or only for you and possibly other workspace moderators*. If you enter a description, e.g. with information about the content, this will be displayed later when you select the template.Tip: For more details and useful tips on this topic, see the tutorial “Reusing content”.
Archive workspace: When you archive a workspace, it remains accessible and with all content, but it can no longer be changed, so no new content can be added. For example, if a seminar for which you had created the project workspace belongs to a past semester and you do not expect (or want) any further changes to the content, you can archive the workspace at this point.
Terms and conditions: You can set individual terms of use for your workspace, which participants must first accept when they join before they can use the workspace. Set the status to “Yes” and enter text if you want to use this feature.
4. Appearance
In this menu there are various settings for the display and design of the workspace.
Configure events: You can select different views as default for the “Calendar” section. The list view shows the calendar as a chronologically sorted list of entries. This selection is very clear if you only enter a few appointments in the calendar that are spread over several months. The month and week view show the conventional calendar sheet view.
Configure color theme: Select a color scheme for the workspace here. Connected to this is the theme image (see below), but you can change it. Associated with each color scheme are different accent colors that are used, for example, for the beams in the workspace.
Workspace image: As default, the preset image of the current theme is always used. However, you can also upload your own image here for the entry page of the workspace. For optimal display, the image should have an aspect ratio of about 5:1 and be at least 1300px wide.
Workspace logo: At this point you can add a logo for your workspace, which will be displayed above the workspace image on the home page of your workspace. Images with a transparent background are particularly suitable as workspace logos.
5. Extensions
This menu allows you to adjust the settings of three useful workspace extensions:
Personal workspaces: The CommSy tool “personal workspaces” creates a separate area that is only accessible for workspace moderation and a single student. The workspace moderator can set individual tasks here and then correct them after completion – only visible to the respective students. The workspace moderator can enter any person workspace of the project workspace; the students, however, can only enter their own personal workspace.
Assessments: If you check the box to activate the assessment function, users will be able to give a star rating to others’ entries (e.g., contributions to a discussion). They can rate entries with up to 5 stars to mark their quality, for example.
| Hint: This function can be useful if you teach a seminar, for example, and your students regularly have to write short contributions about specific topics. The star rating can provide them with useful feedback. |
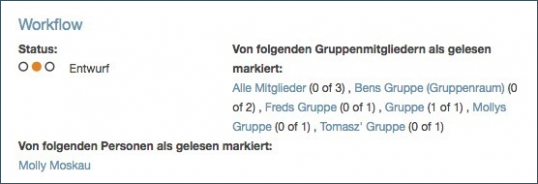
Workflow settings: Workflow support is an additional setting for the “Materials” rubric. You can find it in the list of material entries and on the top right of each individual material entry. To change the status of a material entry, open it and edit the “Workflow” section (Fig. 7). Select a status and save your changes.
If the “Resubmission” function has been activated in the settings, you can set a resubmission date. In addition, you can have a notification sent to the creator or all modifiers (and additional recipients) once the date has passed. The “Validity date” setting offers the same options.
Finally, you can adjust the “Reader view” setting. If you activate it for your workspace, it will also be displayed in the “Workflow” section of each material entry. This setting allows workspace members to mark individual entries (homework assignments, for example) as “read.” Select “Users” unless you specifically want to know the reader status of group members. We recommend that you check “Reader view only for moderators.” Otherwise, all workspace members will be able to see who has read which entry.
6. Invitations
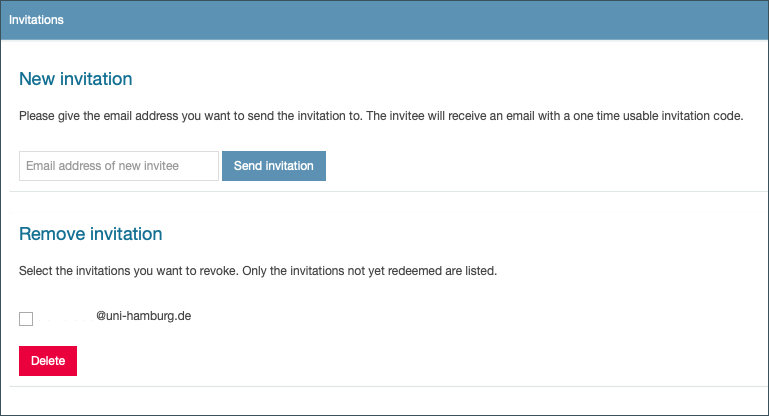
In principle, all members of the UHH can log in independently with their "B-Kennung" (User/STiNE ID). Therefore you do not need to be invited in this way. However, if you would like to invite a non-member of the UHH to one of your workspaces, you can send an invitation as a moderator in this workspace settings menu to people who do not yet have access to the platform. To do this, enter the e-mail address of the person to be invited and then click on “Send invitation”. The person will then receive a one-time activation code and instructions on how to log in to the portal. After successfully creating an account on the platform, they can now apply to participate in the desired workspace.
You can also delete an invitation if it has not yet been redeemed.
7. Delete
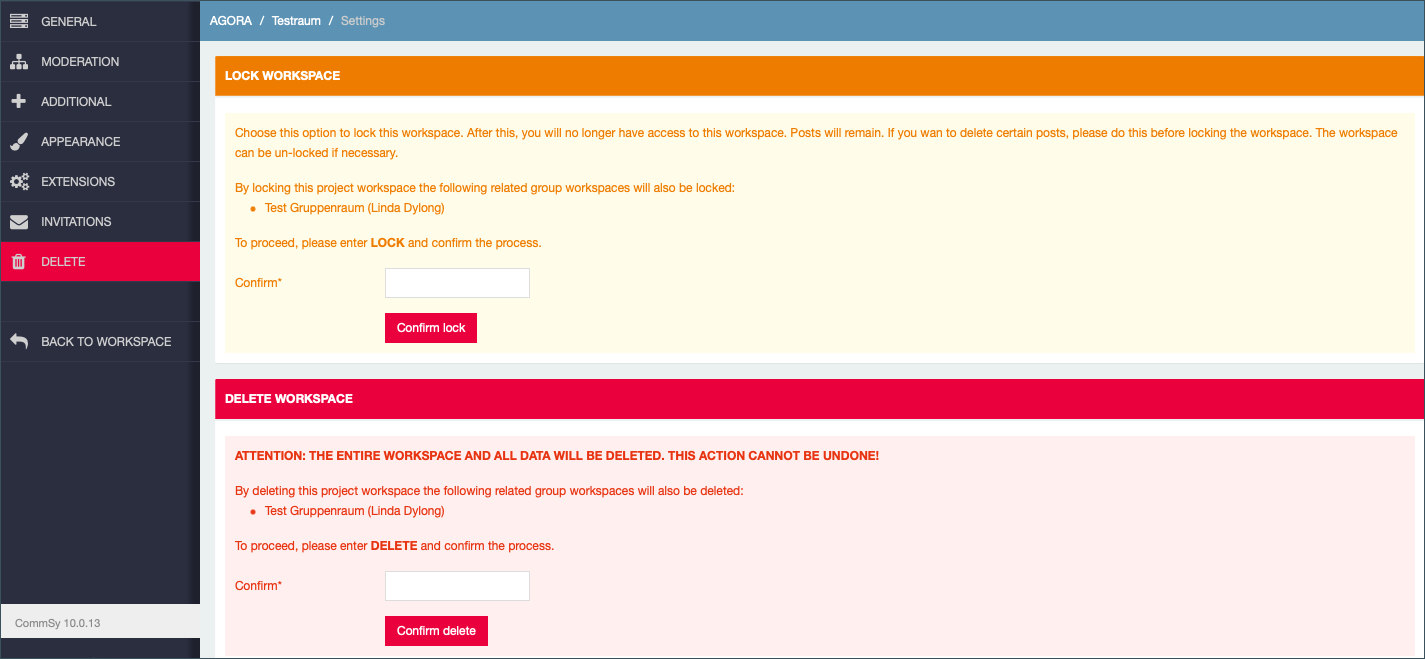
The red button for locking or deleting your workspace is the last of the 7 options listed in the settings menu. You can either lock or delete your workspace (Fig.9)
- Lock workspace: You can lock your workspace, so that nobody including you has access to this workspace. You can un-lock your workspace later on if necessary.
- Delete workspace: Please note that the deletion process cannot be undone and all workspace data will be irrevocably lost. If you really want to delete your workspace, enter the word “DELETE” in the text field and click on the “Delete” button to finally confirm the deletion process.
