Structuring workspace content
This tutorial explains 4 methods for clearly structuring the contents of a workspace
- The easiest way is to use linked entries. You can find these underneath each material entry. Simply link all entries with related content.
- Sections, which allow subdivision of material entries into multiple parts, are especially popular among our users. You can use sections to structure existing material entries more clearly. This automatically generates a table of contents. You can attach files to each individual section.
- Another way of structuring or linking entries in CommSy is to group them into categories or assign tags. Tags are shown on the entry page itself and on the homepage of your workspace.
| Note: Workspace moderators can activate categories and tags in the “Additional” section of the workspace settings. The activated structuring auxiliaries will be shown on the right side of all rubrics (“Materials”, “Discussions” and so on). The chapters in this tutorial explain how you can customize these structural auxiliaries. |
1. Linked entries
“Linked entries” are the first structural auxiliary you can use. They allow you to connect related entries within a project or group workspace. These entries can be in any rubric. Underneath each entry, you will find a section entitled “Linked entries”, which contains a list of all entries that have been linked to the current one (Fig. 1).
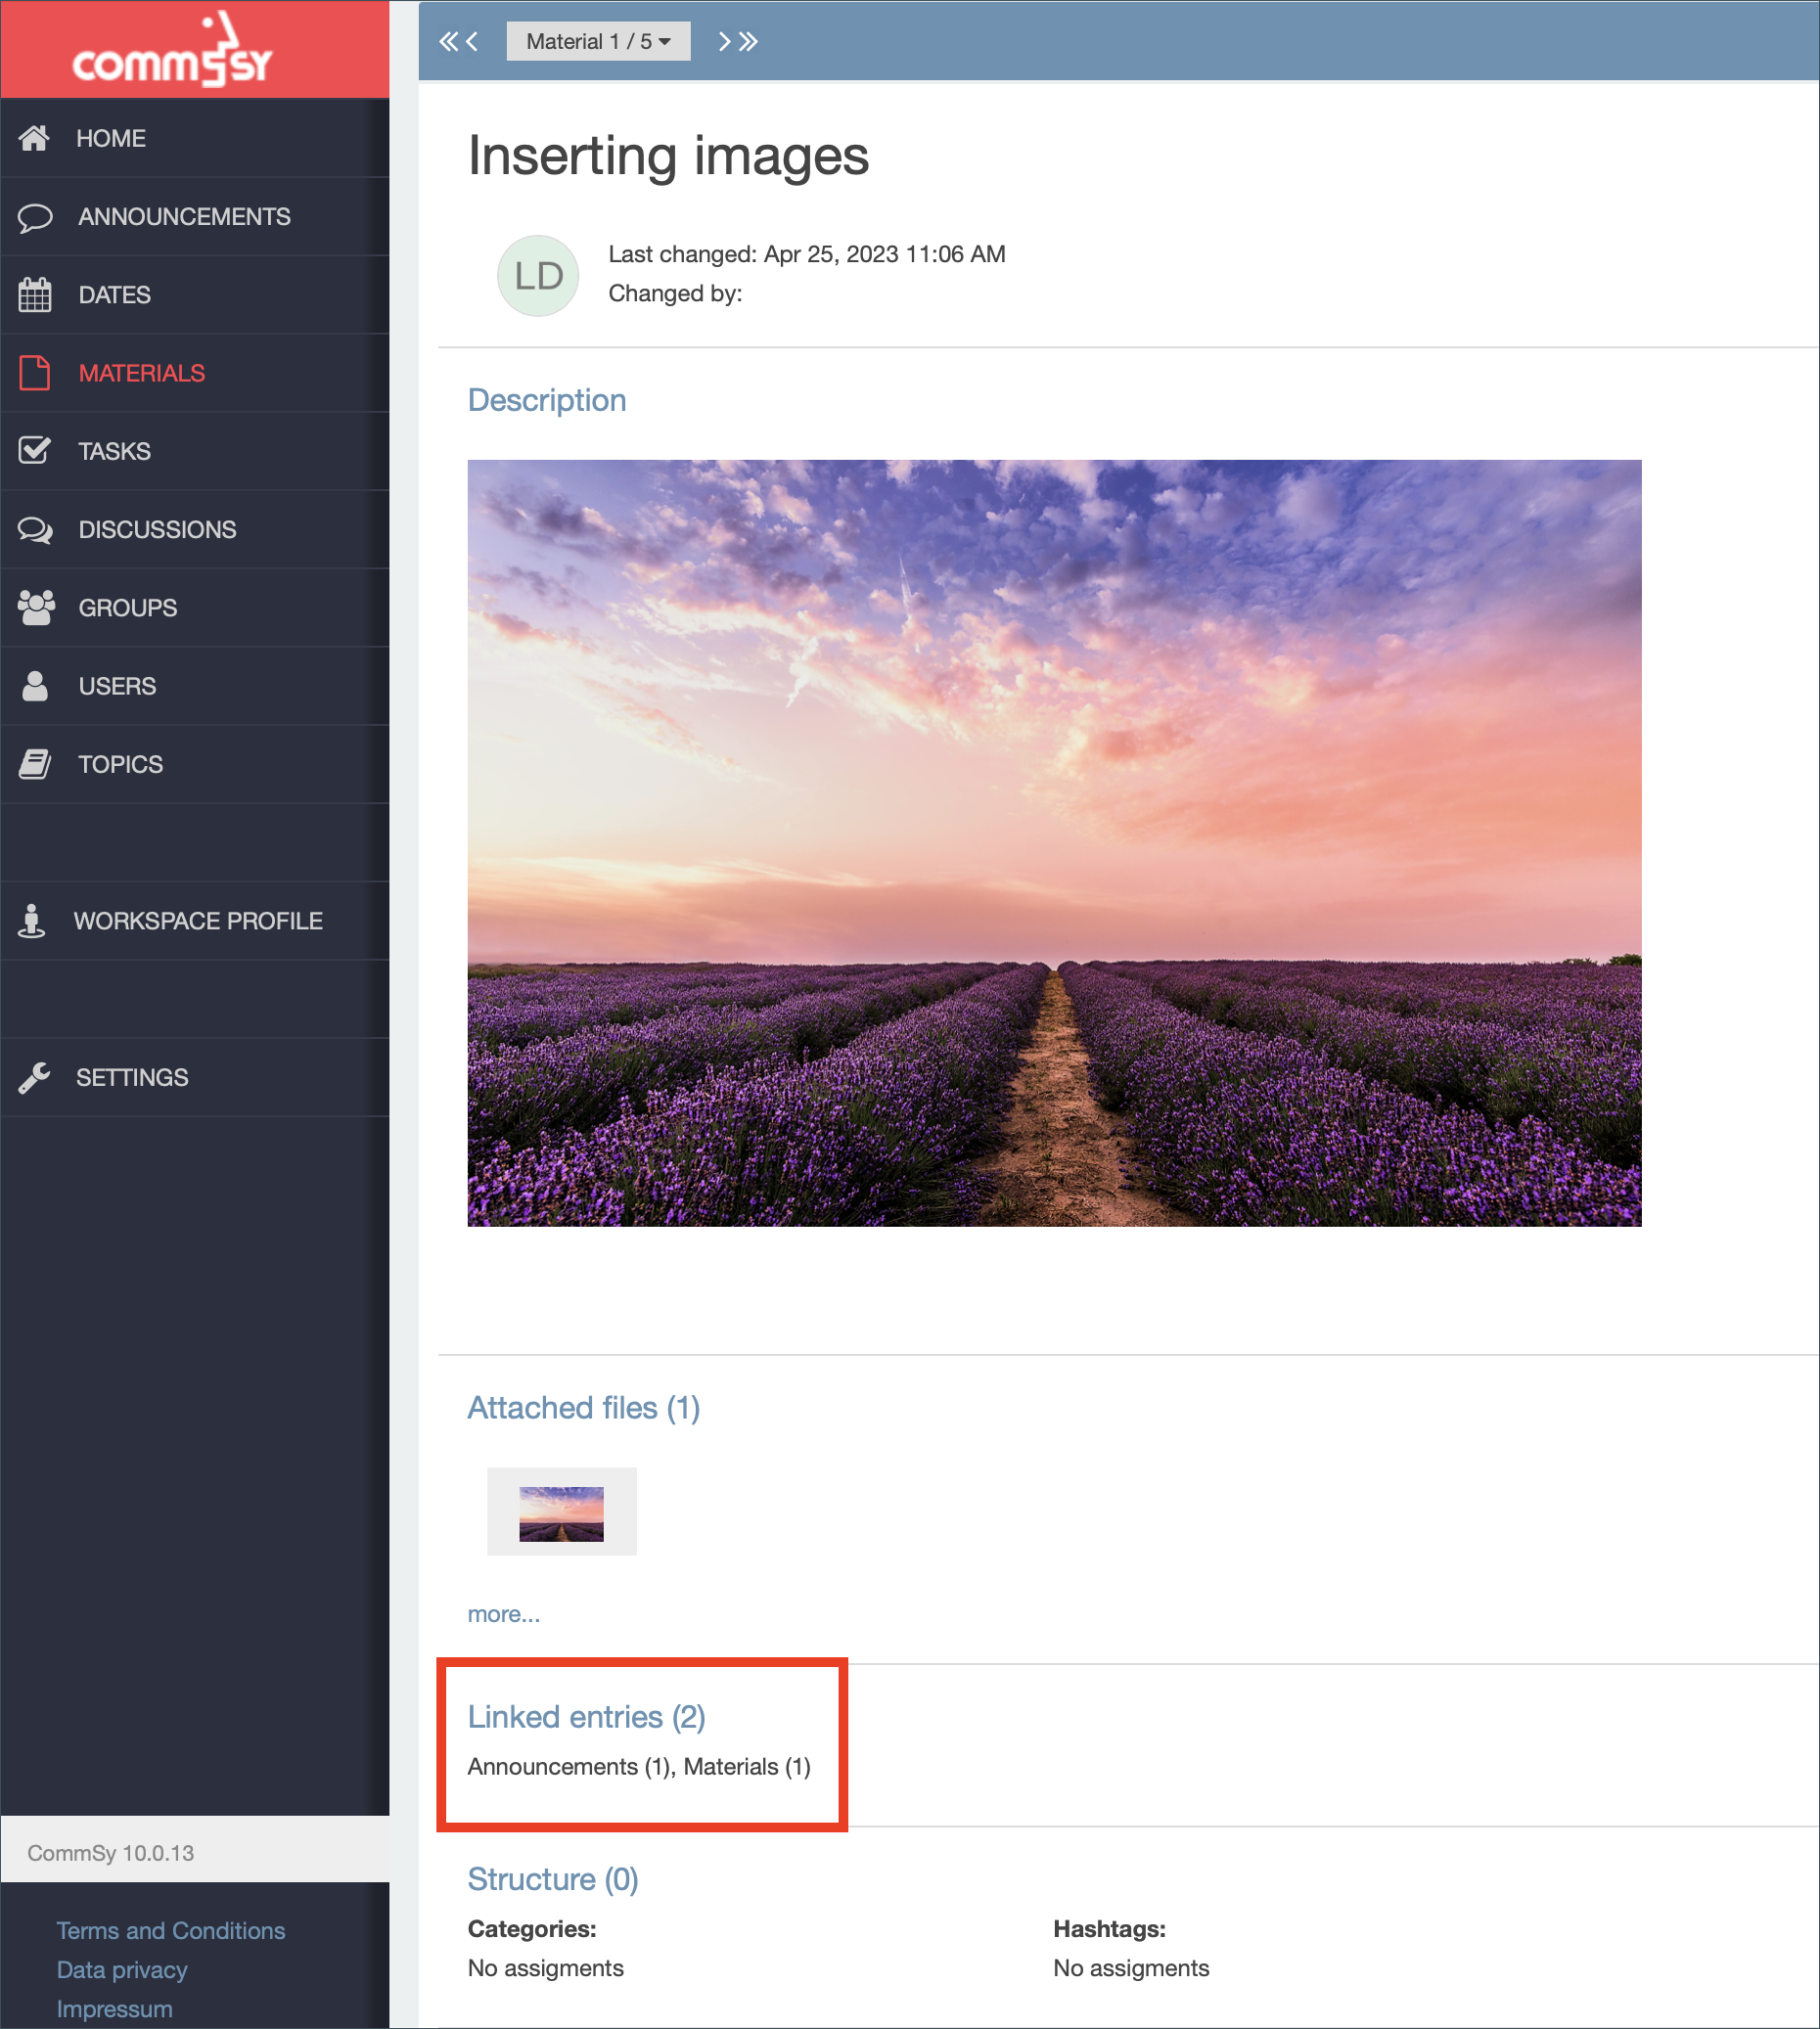
To connect an entry to other entries, follow these steps:
- Add a new entry or open an existing entry in any rubric.
- Move your mouse cursor to the section entitled “Linked entries” towards the bottom of the entry. The edit symbol will appear on the right side. Click it.
- Stay in the tab called “Linked entries” and use the search field or the “Last modified” menu to find another entry to link. This entry must be in the same workspace.
- Save your changes.
The newly created links will now be displayed underneath each linked entry. To view the links and use them to navigate between linked entries, you might have to expand the “Linked entries” section by clicking the arrow symbol on the right.
| Note: You need to open one of the linked entries to see which other entries are linked to it. There is no external overview of these connections. |
2. Sections in material entries
If you are publishing your files and entries via the “Materials” rubric, the sections function will allow you to add a clear, meaningful structure to your entries.
You can divide each material entry into as many sections as you want. This automatically generates a table of contents, which lists the individual sections as links and allows users to jump directly to them. You can change the order of your sections at any time. Users can also see when each section was last edited.
| Tip: You can edit each section individually and add files to it. |
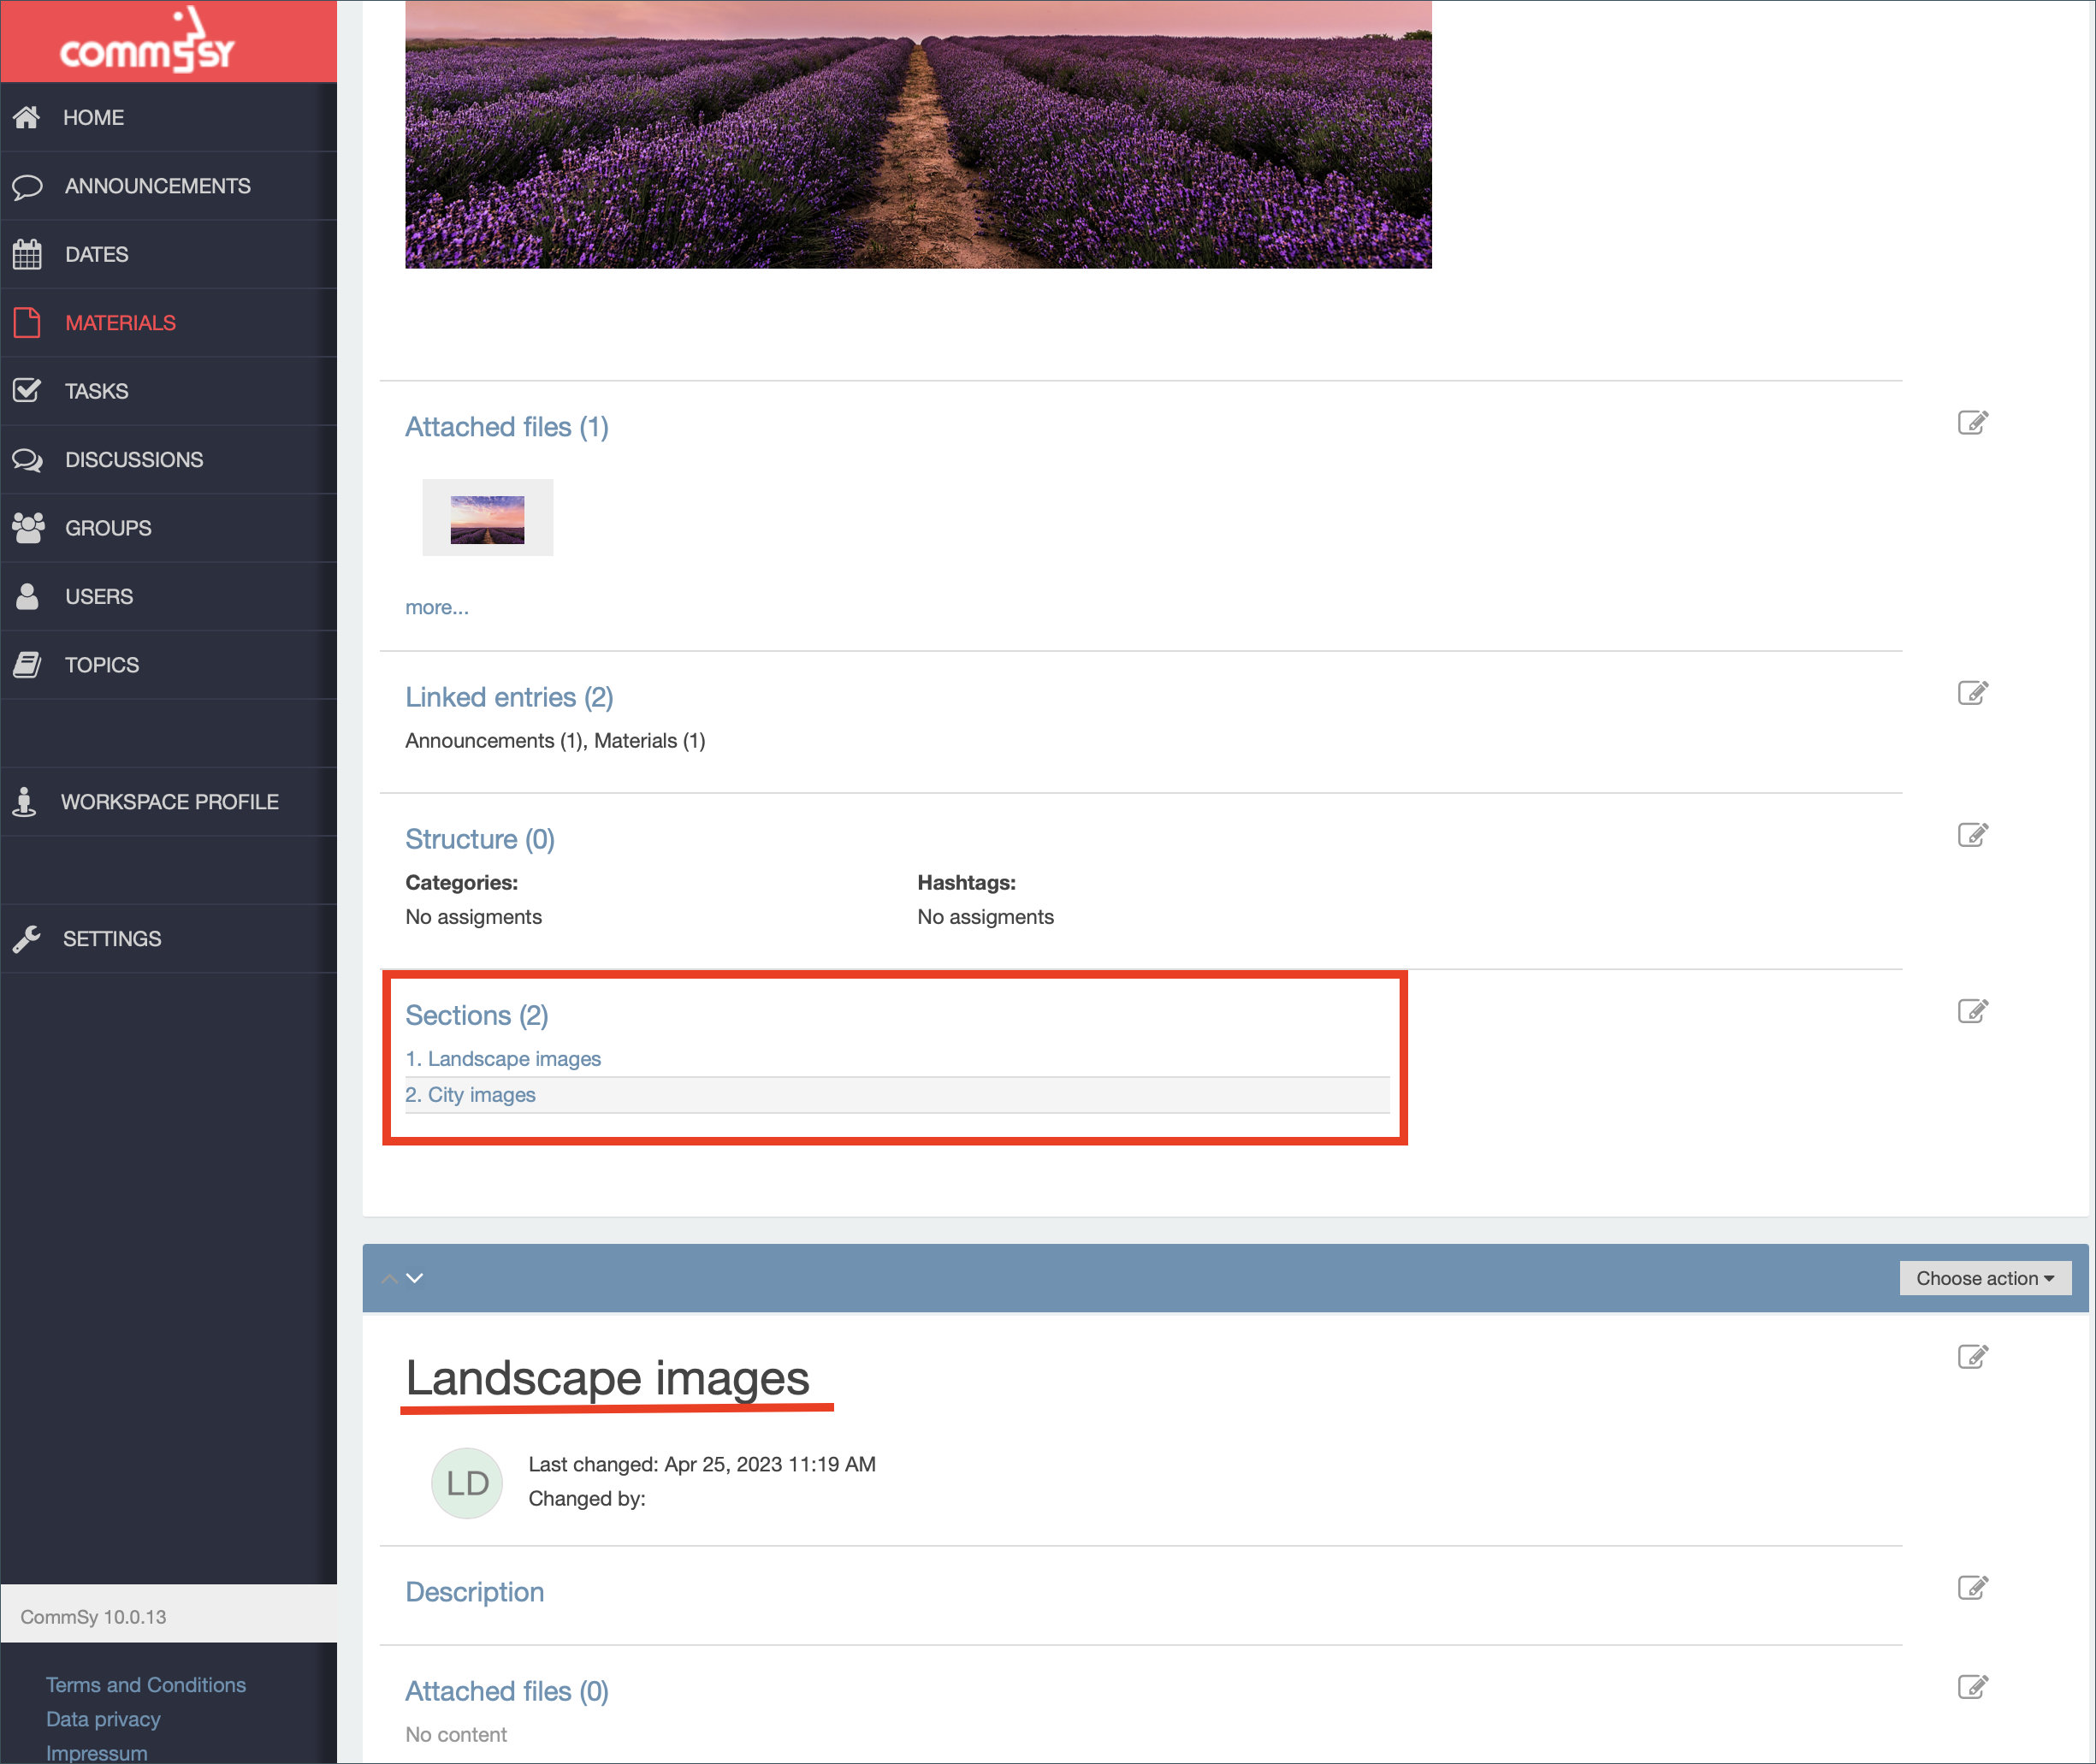
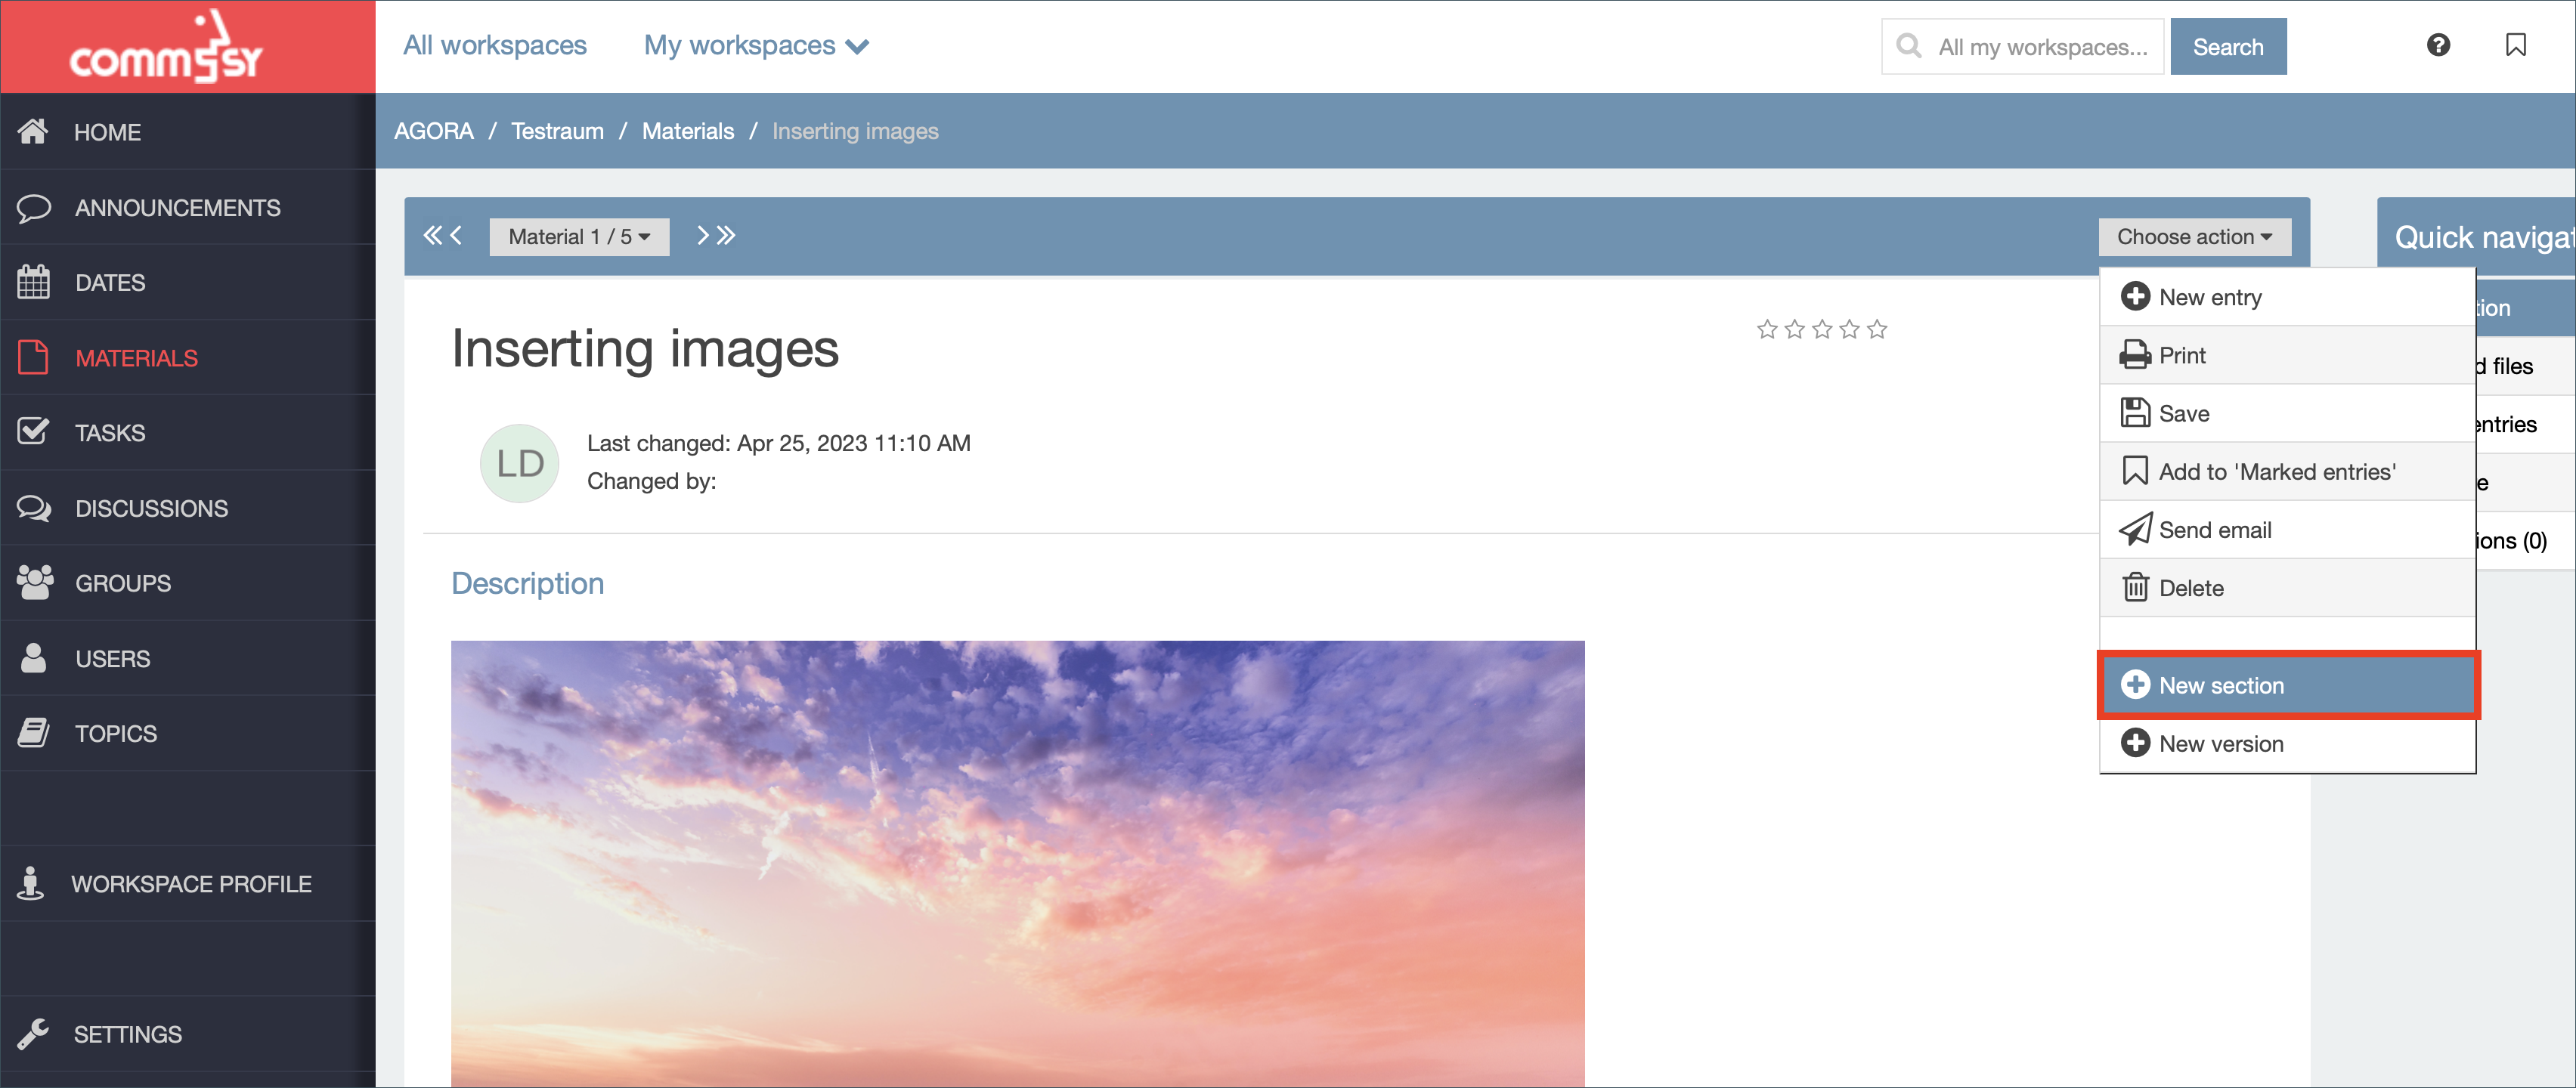
Creating a new section: You can only create sections within existing material entries. Learn how to create a new material entry in our tutorial “adding materials”. Open the material entry you wish to structure. Click the dropdown menu labeled “Choose action” in the top right corner and select “New section”.
Give your new section a title. It will be used in the table of contents later. CommSy automatically generates and numbers this table of contents. Under “Description”, you can add text or files that will be displayed underneath the section. This is similar to the process of adding a description to a new material entry. You cannot hide individual sections or modify their access rights.

If the material entry already contains sections, new sections are always listed at the end. To change their order, click the edit symbol on the right side of “Sections” and rearrange the individual sections using drag and drop.
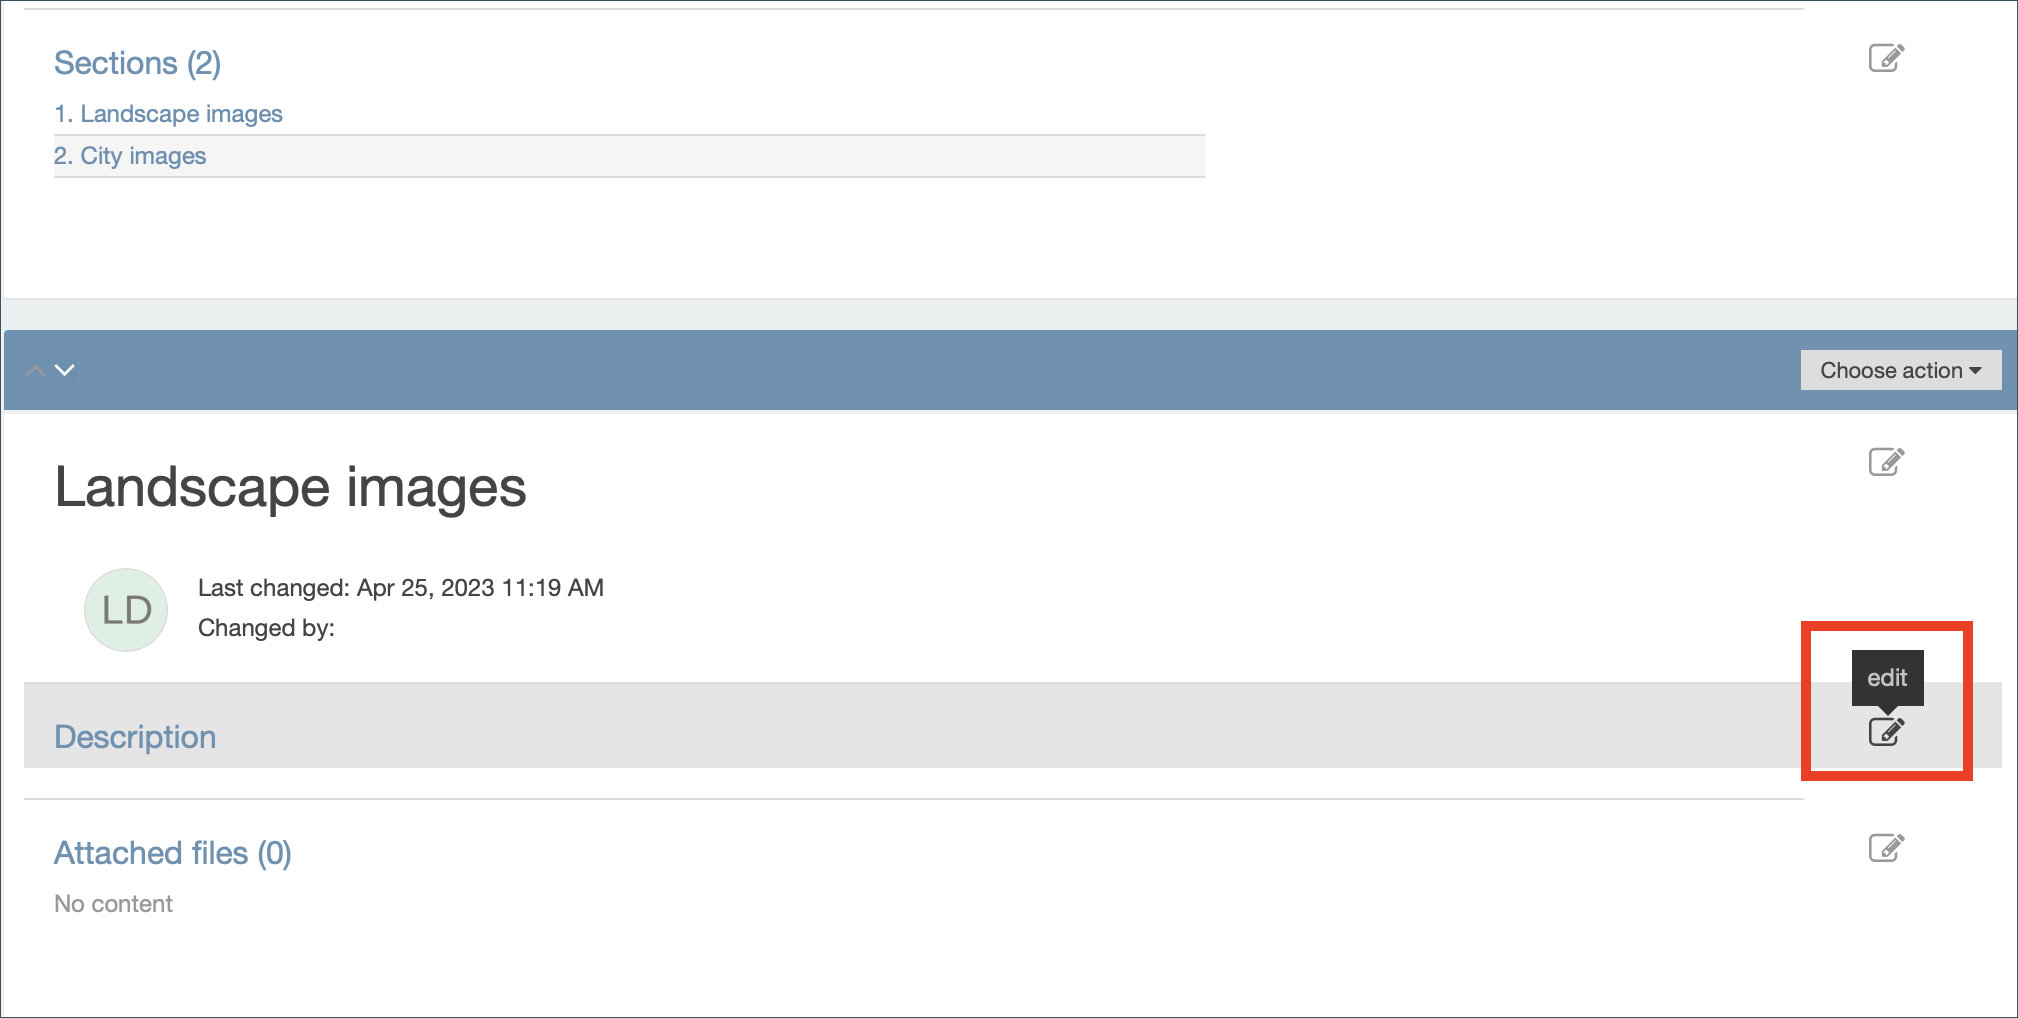
Editing a section after creating it: If you want to edit a section that you have already created, scroll to its title first. Click the edit symbol to the right of the title, description, or files list. You need to save your changes every time you edit a section.
| Tip: There are various scenarios in which sections can be useful. For example, if you are using a single material entry to list all reading material needed for a seminar, you can add a new section containing the relevant files after each class. Alternatively, you could use sections if you want your students to complete exercises in CommSy without having to add a new entry for each exercise. In this case, every workspace member could have their own personal material entry and add new sections to it whenever needed. |
3. Hashtags
Hashtags can help you structure entries in the various rubrics of a project workspace. You can assign one or more hashtags to any entry. The hashtags used in a workspace are shown on the right side of every rubric (Fig. 6). Tags cannot be used to structure content hierarchically. To do this, use the structural auxiliary “categories” (see Chapter 4).
Hashtags function as links: When you click a hashtag, you see a list of all entries that have been assigned this hashtag.
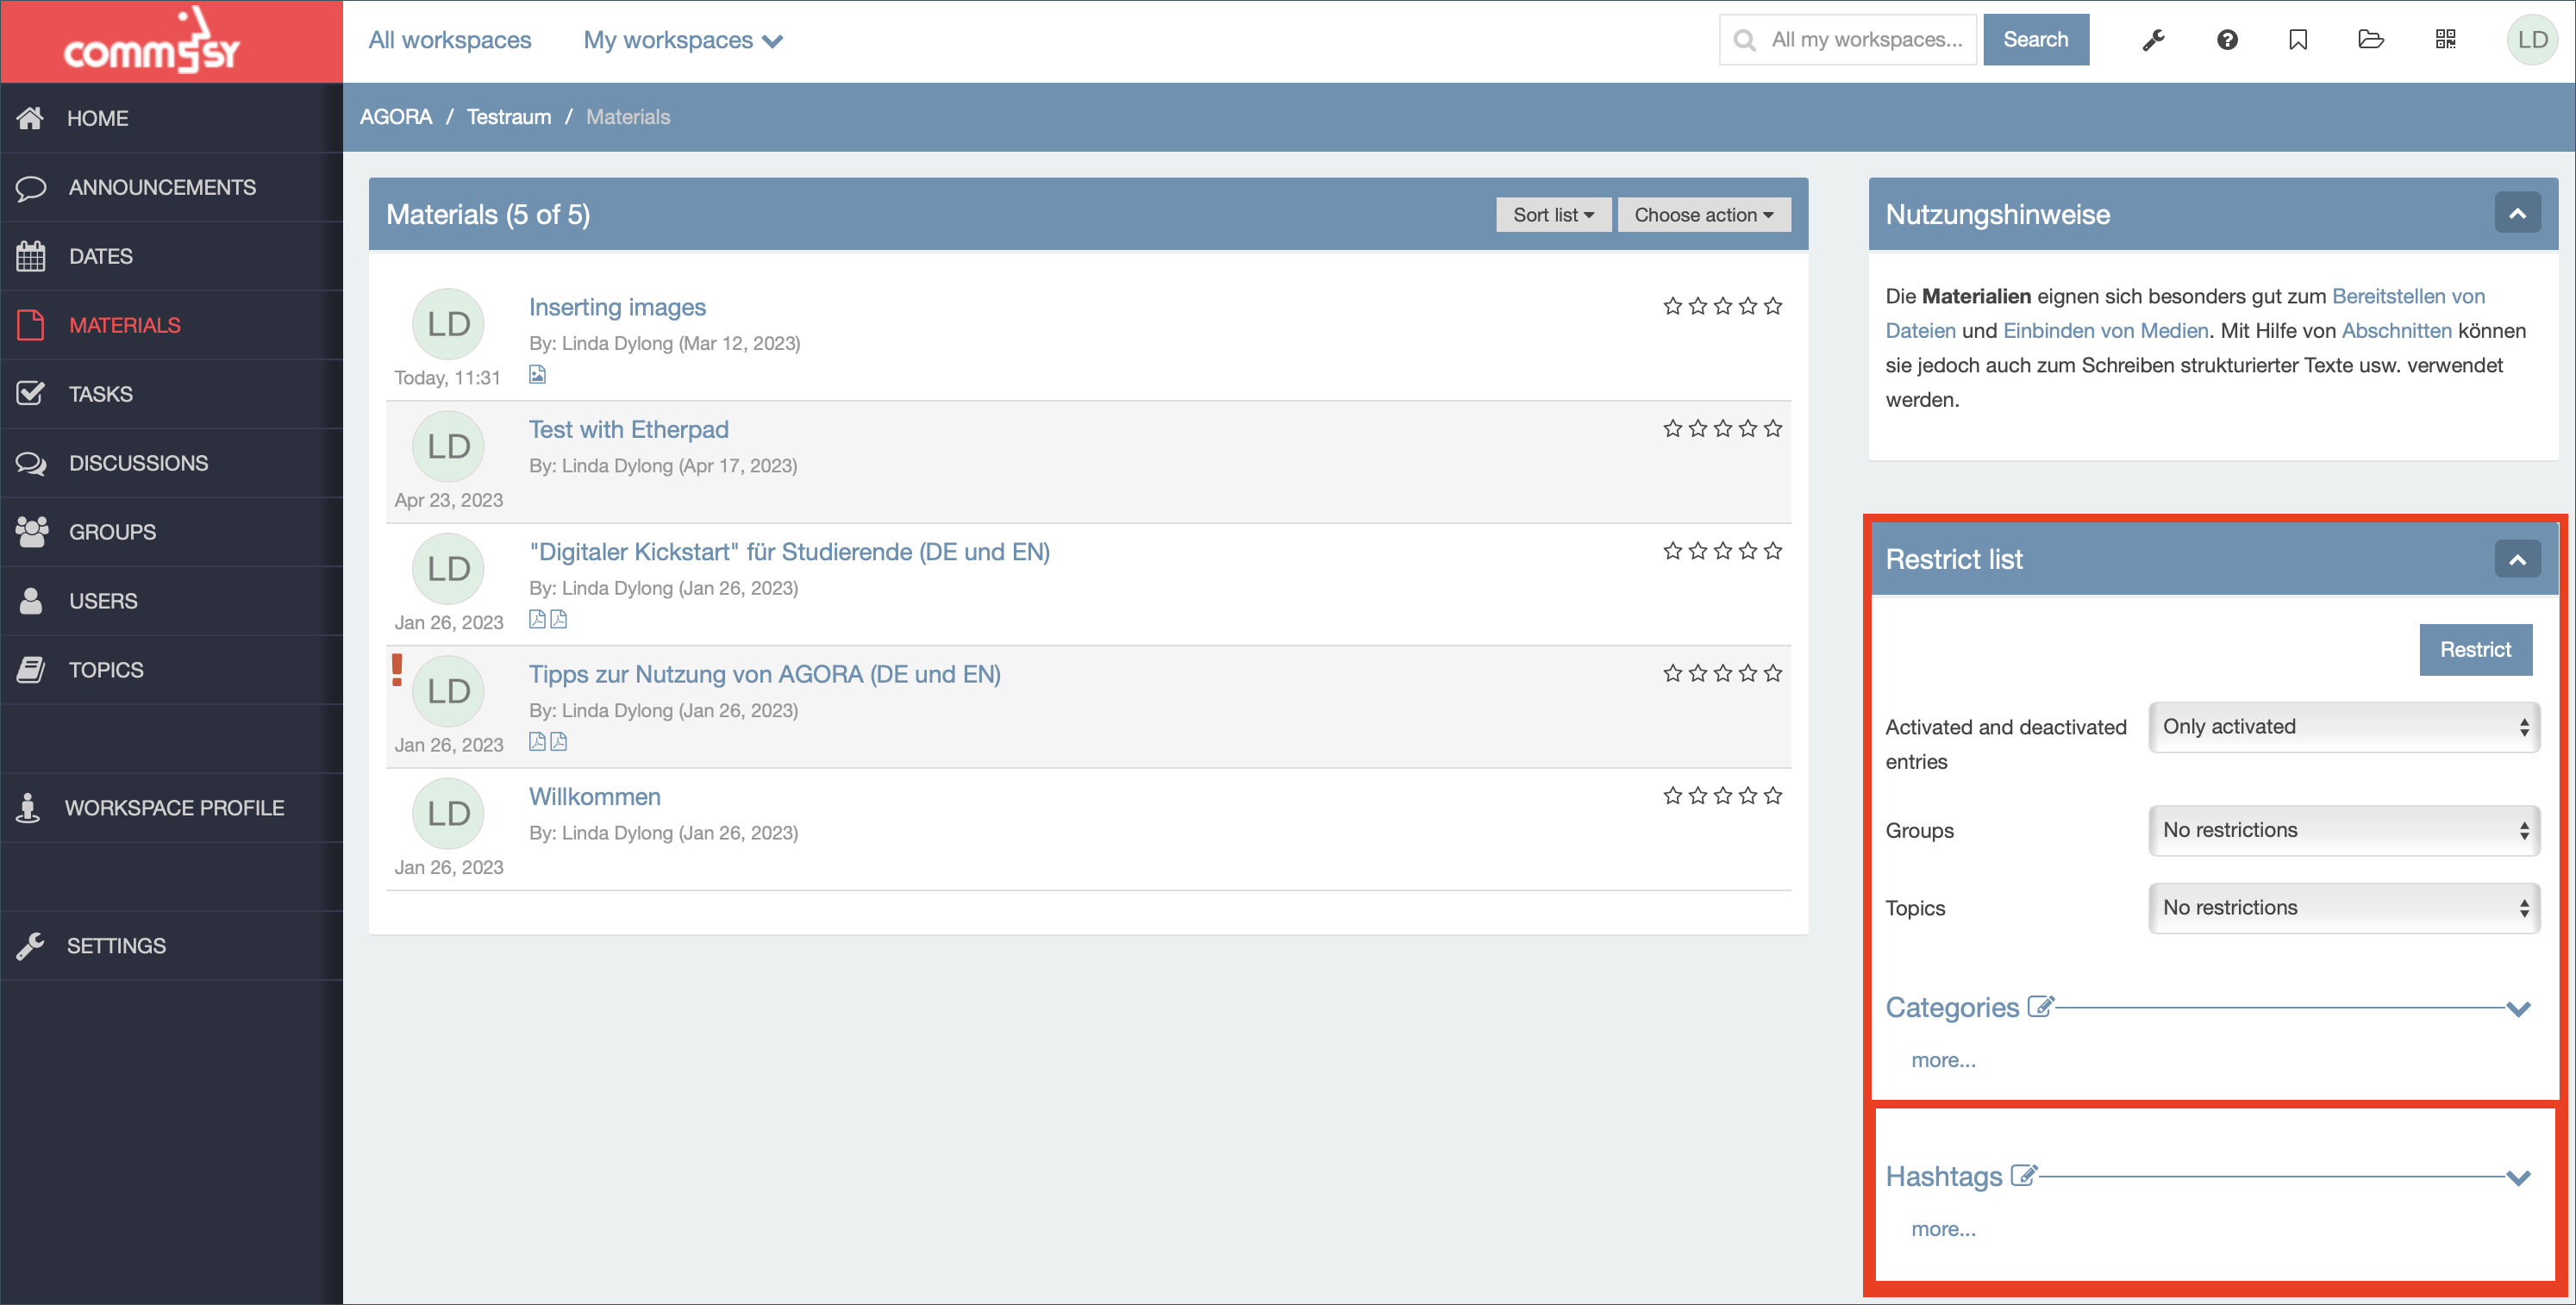
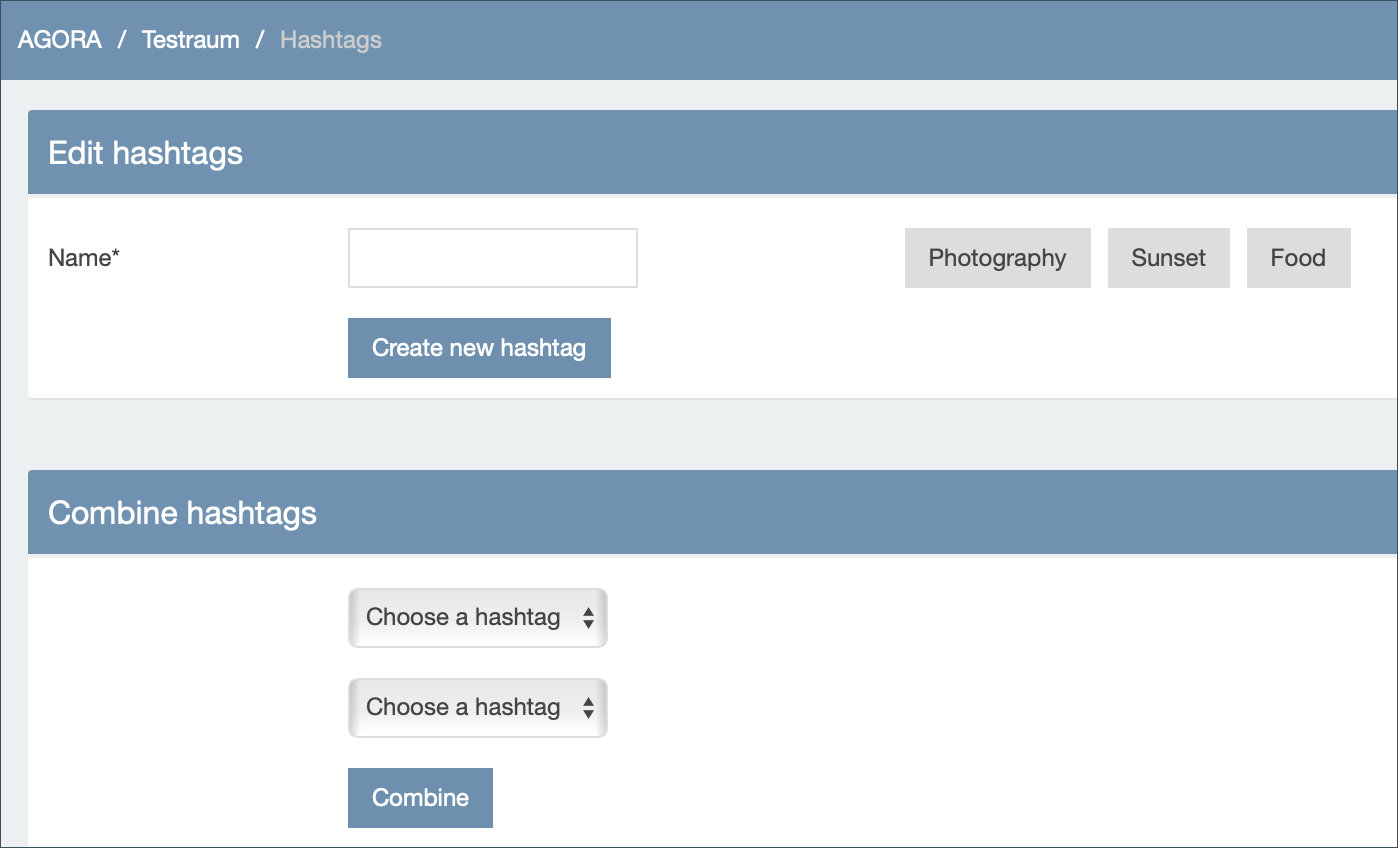
Creating, editing, and deleting hashtags: Creating a new hashtag: Open any rubric in the workspace. On the right side, click the edit symbol next to the word “Hashtags” (Fig. 6). The tag editor opens (Fig. 7). To create a new tag, enter a name for the tag and click “Create new hashtag”. Alternatively, you can add new tags to entries directly (see below).
Editing hashtags: Select a tag from the list to the right of the input field. The editor view changes (Fig. 8). You can enter a new name for the tag and save it by clicking “Update hashtag”.
Combining hashtags: Select two different hashtags from the two dropdown menus in the second menu, “Combining hashtags”. When you click “Combine”, the two hashtags will be merged. The new tag will initially contain both names, separated with a forward slash. To edit the name of the new hashtag, use the first menu again. If you want to combine more than two hashtags, repeat the process by combining the newly merged word with another.
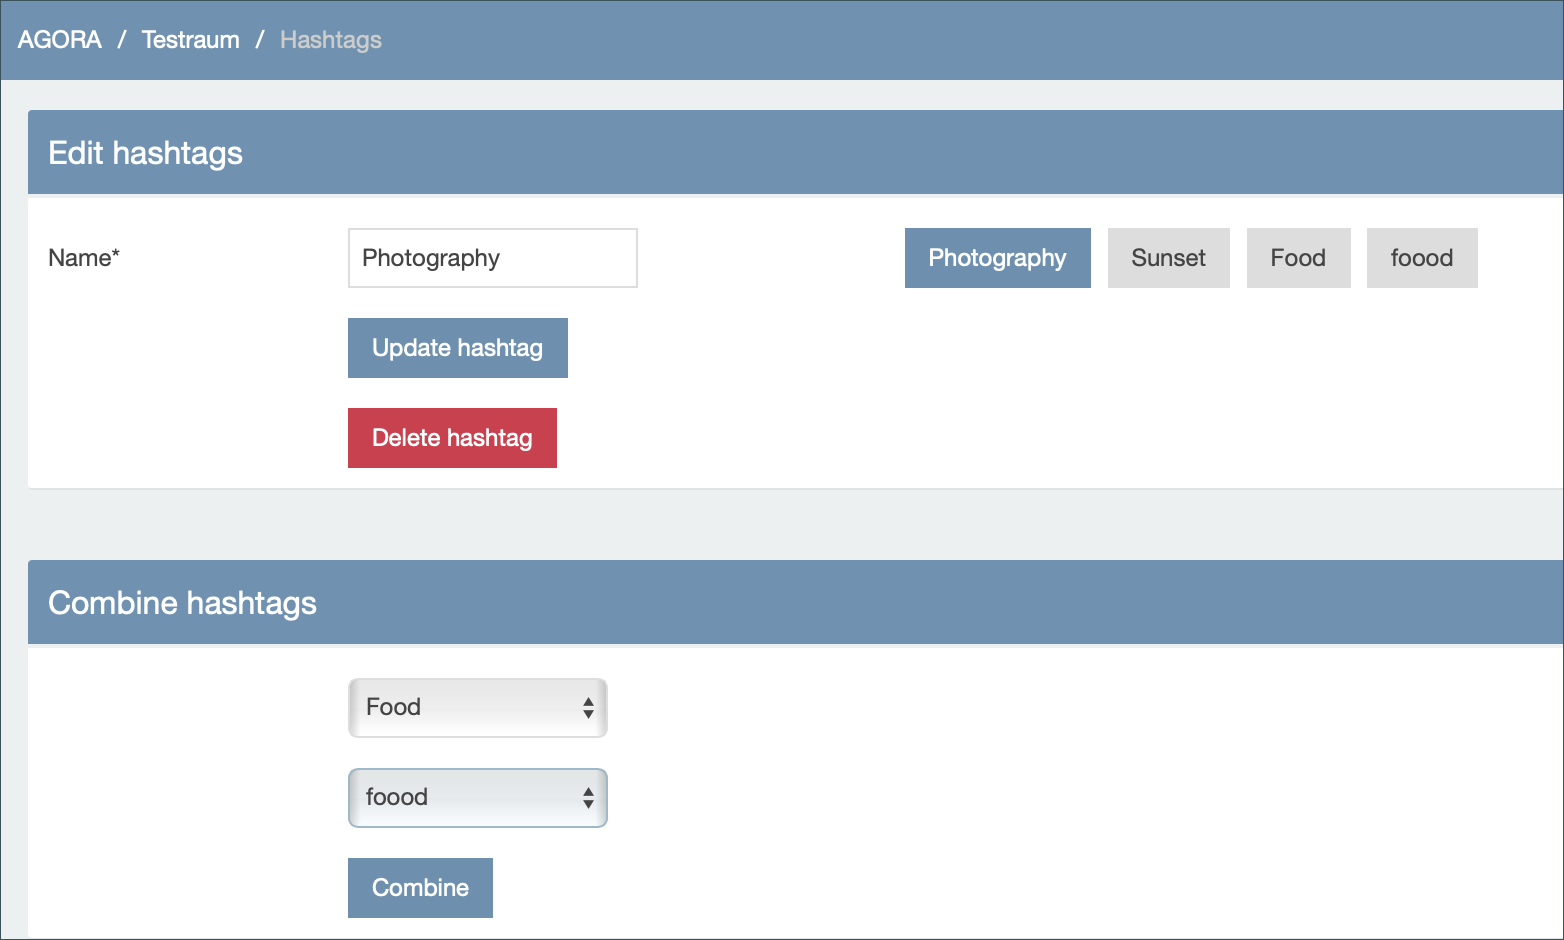
Deleting hashtags: Select a hashtag from the list to the right of the input field. Click the button labeled “Delete hashtag”. All links to this hashtag will be deleted permanently.
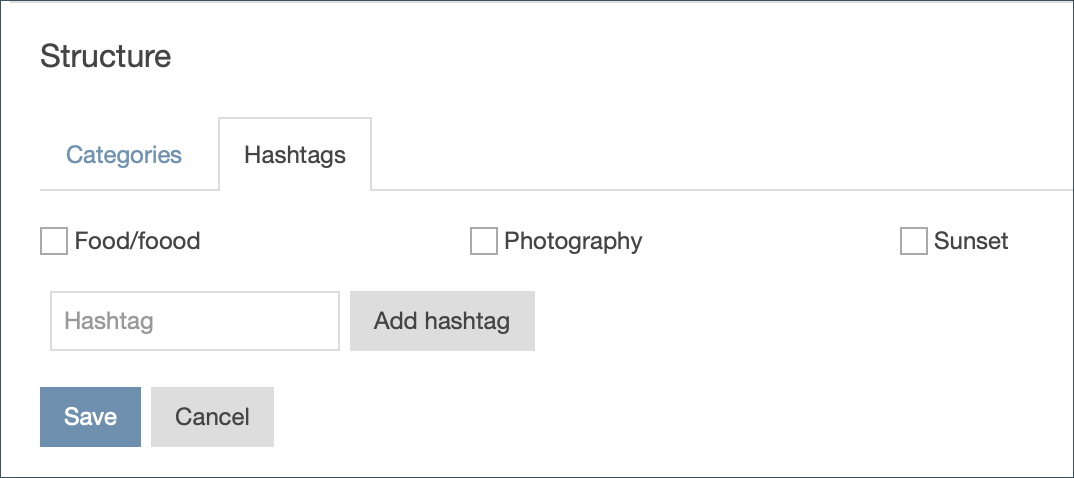
Tagging an entry: To assign hashtags to an entry, open the entry and navigate to the section titled “Structure”. Click the edit symbol on the right side and select the second tab “hashtags”. Make a checkmark in the boxes next to the tags you want to use for your entry, then click “Save”.
At this point you can also add new hashtags, which will then be added to the hashtag list of the workspace. Important: After entering a new name, click on “Add hashtag” before saving.
4. Categories
Categories help you subdivide and structure the content entries of a workspace. Unlike tags, categories can be sorted hierarchically over multiple levels.
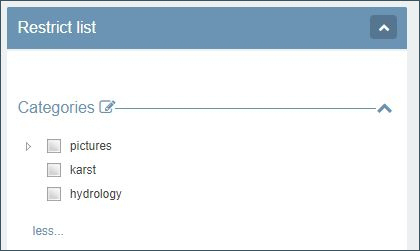
This allows you to create a table of contents for your CommSy workspace. There is no overview of how often a category has been used. In the info column on the right, they are displayed as a tree diagram rather than a cloud (Fig. 10).
Like the tag cloud, the category tree contains links. Click a category in the tree to see a list of all entries in the category.
| Tip: You can make it mandatory for all new entries in your workspace to be assigned a category. This function is useful if you have created a category structure for your workspace and want your workspace members to use it. It ensures that all content is clearly structured. You can activate this requirement in the workspace settings. |
Creating and editing categories
Follow these steps to create and edit categories:
- On the homepage of your workspace, click the stylized pencil symbol (edit symbol) next to “Categories” on the right side (Fig. 10). The category editor opens. You have various options here (Fig. 11).
- To create a new category, enter the category title into the field in the top section and click “Create new category”.
- To rename a category, click “Edit” to the right of the category title in the middle section. Now, enter the new title in the field in the top (!) section. Click “Update category” to save your changes. The new title will be updated everywhere.
- To delete a category, click the red button next to it.
If you want to add a new content entry to an existing category, scroll to the corresponding section further down.
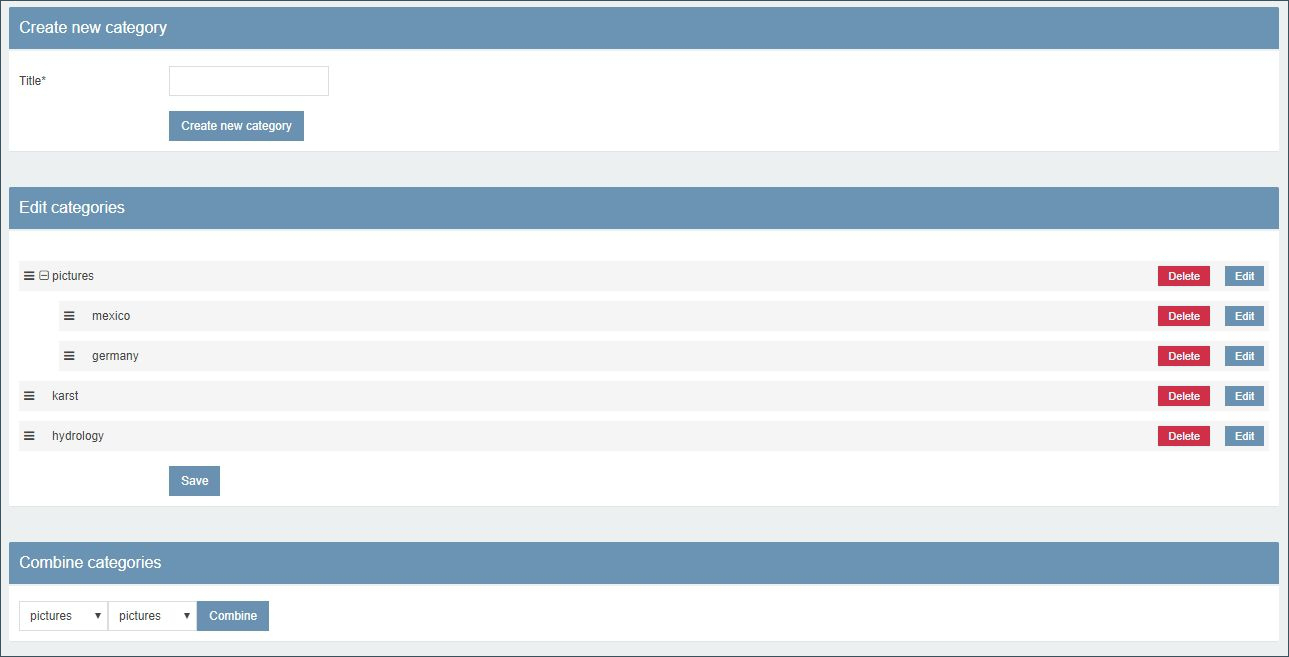
Sorting and structuring categories: You can change the order of your categories by using drag and drop. If you want to create a hierarchy (one category becomes part of another), move the subordinate category a little to the right and release (Fig. 12).

Combining categories: Two or more related categories can be combined into one, just like tags.
- In the bottom section of the category editor, entitled “Combine categories”, select two categories to merge from the dropdown menus.
- Now, click “Combine”. The title of the new category will be composed of the names of both original categories, separated by a forward slash.
If you want to add another category to the two you have already merged, simply repeat the process.
Assigning categories: To assign a category to an entry, open the entry and edit the “Linked entries” section. The edit symbol appears when you hover your mouse over the right side of this section. Open the second tab “Categories” and check all categories you wish to assign to the entry.
