Text editor
The text editor is an important part of each AGORA work space and appears whenever you edit a description in material entries or tasks. The editor is capable of comprehensive formatting settings. Furthermore, you can add images, charts, and external links to your text, to name but a few. While editing the text and scrolling down, the editor toolbar remains at its position, making it easier to edit even long texts

1. Text options
You can use the following commands to edit your text quickly and safe.
1. Cut (Ctrl + X): Cut the marked text in order to add it to your clipboard and to paste it somewhere else.
2. Copy (Ctrl + C): Copy the marked text in order to add it to your clipboard and to paste it somewhere else
3. Paste (Ctrl + V): Add the text from your clipbord that you copied or cut earlier to your current position in the text editor.
4. Paste from Word: This function can be used to insert texts directly from Word.
5. Undo (Ctrl + Z): Use this in order to undo an formatting action.
6. Restore (Ctrl + Y): Use this in order to rewind and undo command.
| Tip: Alternatively, you can use the corresponding buttons in the text editor toolbar. |

2. Text formatting
The buttons reflect various formatting options (Img. 2).
Restore (Ctrl + Y): If you accidently deleted your text, you can restore it this way.
1. Paragraph format: Here you can select different formatting styles, for example to highlight headlines.
2. Font: Select a suitable font here.
3. Font size: The font size can be specified in small steps.
4. Text and background colours: You can mark important passages in various text and/or background colours. Select “Reset formatting” to reactivate the default formatting style.
5. Furthermore, you can hightlight text passages in bold (Ctrl + B), italics (Ctrl + I) or as strikethrough text.
Enumeration and bullet lists can be created by clicking the corresponding buttons in the tool bar. Using the tabluator key indents the active paragraph by one step.

In addition, the following text formatting can still be done with the editor:
6. Alignment of the text (left-aligned, central, right-aligned, justified).
7. Insert separator lines
8. Insert/remove numbered list
9. Bullet lists
10. Increase or decrease indentation with these icons
3. Creating and editing a link
One of the key features of the text editor, embedding external links, can be accessed by clicking the paper clip symbol.
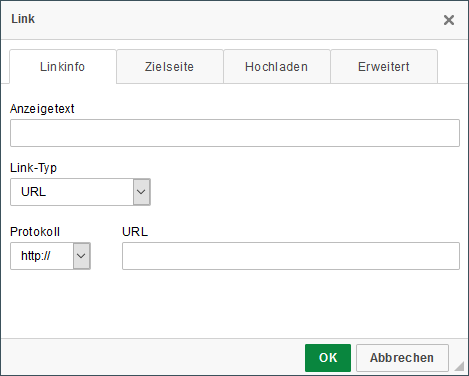
A window will pop up in which you can create a link.

Insert the needed URL code here. In advance, please mark the text string which will be transformed into a hyperlink. Alternatively you can insert a description to the link in the “Display text” field.
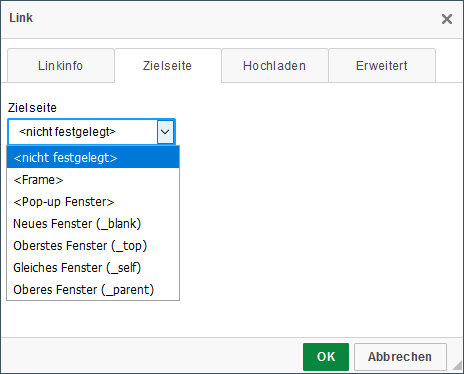
In a last step, please choose in which format the linked page will open (Img. 4).

The most important options are:
-
<Frame> = The target page will open in your active browser tab, overwriting the current tab.
-
<Pop-up Fenster> = The target page will open in a new browser tab.
4. Create a table
With AGORA you can also create tables in the text editor. To do this, click on the table icon in the text editor.
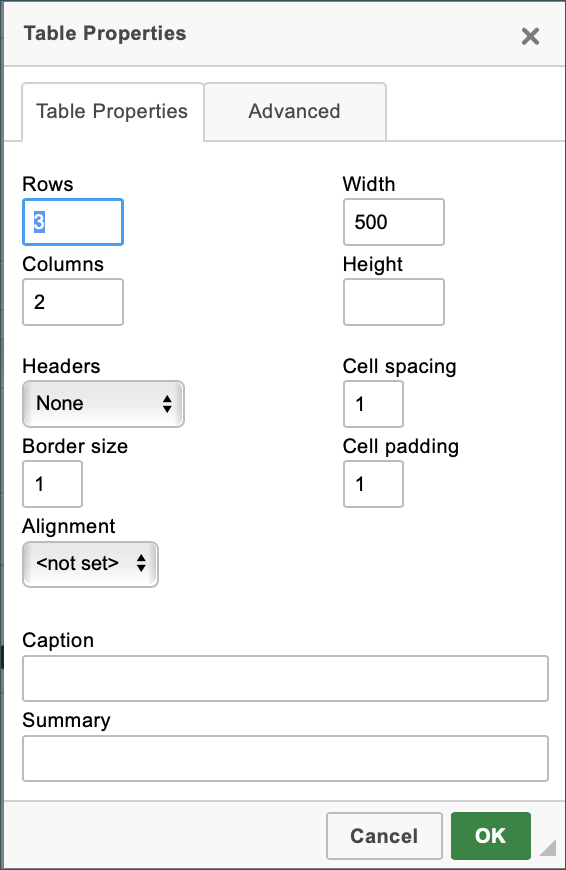
Then a window opens (Fig. 5). There you can make all relevant settings.
First, define the number of columns and rows.
Optionally, you can activate a header line.
You can also choose between left, right and centered alignment.

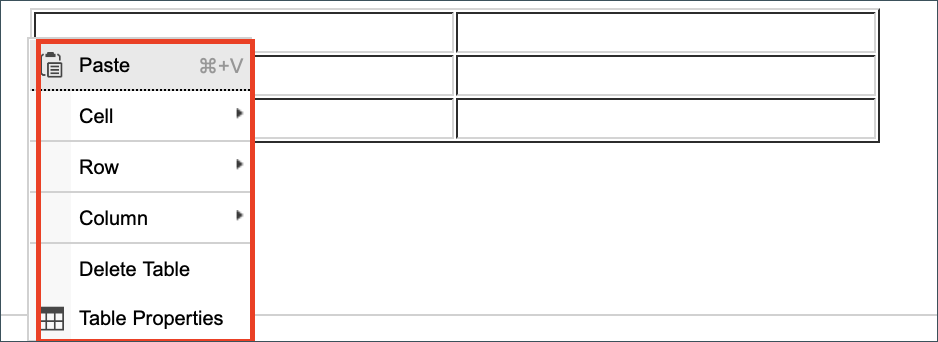
Click on “OK” for creating the table. Right-click on the table field to open the following setting options (Fig. 6):
- Insert/connect/divide cells
- Insert/connect/remove rows
- Insert/delete columns
- Edit table properties
(1) You can also drag the table larger or smaller using the dots (see Fig. 6).
| Tip: Use the editor functions here as well to make the table look appealing. Practice creating tables and try out all the functions. |

5. Embedding media
| Note: To insert media, please see our detailed tutorial concerning embedding images, videos, and other data files. |
6. Etherpad
The etherpad, an alternative text editor implemented in AGORA, allows several members to edit a text collaboratively at the same time. Please see our tutorial for further information.
